- Quick summary
- What should security cameras cover first?
- What camera types and lens sizes work best?
- How to Optimize Security Cameras for Night Vision
- Why hardwired PoE cameras outperform Wi-Fi systems
- How to Calculate Security Camera Storage Requirements
- Which AI features actually matter?
- Consumer vs prosumer vs enterprise security cameras
- How much does a security camera system cost in 2026?
- Best Security Camera Placement Patterns
- How to Tune Security Camera Notifications
- What privacy and policy decisions should be documented?
- DIY or professional install?
- FAQ
- Checklist
- Case study: night clarity without floodlights
- References
- Next steps
Quick summary
Choose security cameras based on the scene they need to cover. In 2026, the most useful systems pair wide context views with tighter identification views, favor hardwired PoE when reliability matters, size storage from real bitrate math, and use smart detections carefully so alerts remain useful.
- Cover doors, gates, walkways, and driveways first.
- Use turret or dome cameras for most exterior identification views, then match lens size to distance.
- Treat 1 Mbps average bitrate as about 10.8 GB per day when sizing retention.
- Prefer local recording plus secure remote access when you want predictable history and fewer recurring fees.
Read this page in order: start with coverage goals, then choose camera types and lens sizes, then size storage, alerts, and budget around those decisions.
- Security & Surveillance services
- Security cameras and access control checklist
- UniFi Protect retention sizing
- How to design a security camera system for a Westchester home
What should security cameras cover first?
Cover doors, walkways, driveways, gates, and any place where people or vehicles slow down. Those scenes create the clearest faces, the best vehicle context, and the least wasted storage.
Start with approach paths and entry points, then add overview coverage. A wide front-yard or parking-lot camera helps explain what happened, but it rarely replaces a tighter identification view at a door, gate, garage apron, lobby, or package area. If access control is part of the project, treat readers, intercoms, and unlock points as camera anchors.
-
Start with approaches and doors: cover the scenes where people or vehicles naturally slow down.
-
Place ID cameras close: keep identification views within roughly 8 to 15 feet when possible.
-
Avoid wasted framing: do not aim across public roads or sidewalks unless that is the actual requirement.
-
Name each view by job: label every camera by location and purpose before the install is finished.
What camera types and lens sizes work best?
Turret cameras are best for glare-resistant exterior coverage, dome cameras are ideal for discreet indoor monitoring, and bullet cameras suit long, narrow views. Lens focal length determines whether a camera gives you broad context or usable identification.
Use wider lenses such as 2.8 mm to 4 mm for porches, rooms, and driveway overviews. Move to 6 mm to 12 mm when you know exactly where a face or plate should appear, such as a gate, apron, or side path. Wider framing spreads pixels over more area, so lens choice usually matters more than trying to recover detail later with digital zoom.
| Lens | Best use | Typical face ID distance | Typical plate distance | Starting note |
|---|---|---|---|---|
| 2.8 mm | Porch, lobby, room, wide exterior context | 8 to 12 ft | Not ideal | Use for context or close face ID, not long-range detail |
| 4 mm | Entry, walkway, garage apron, tighter porch view | 12 to 20 ft | 15 to 20 ft if vehicles slow or stop | Good default when 2.8 mm feels too wide |
| 8 mm | Gate, driveway choke point, tighter perimeter ID | 20 to 40 ft | 25 to 40 ft on slow approaches | Useful when you know exactly where the subject will pass |
| 12 mm | Dedicated lane, gate, or narrow long view | 35 to 60 ft | 40 to 70 ft in controlled scenes | Works best when lane, height, and angle are tightly managed |
Context view means a wider scene that shows approach path, direction, and sequence. Identification view means tighter framing that captures a usable face or plate without relying on digital zoom later.
How to Optimize Security Cameras for Night Vision
Optimize security cameras for night vision by controlling light, placement, and exposure before relying on infrared range claims. Good night footage comes from preserving usable faces and plates, not from making the scene look artificially bright.
Use gentle ambient light near doors, gates, and walkways so the camera does not have to push gain aggressively after dark. Warm 2700K to 3000K fill light often produces more usable evidence than a harsh motion flood. Infrared still has value, but it breaks down when reflective siding, glass, polished trim, or headlights bounce light back into the lens. Mounting height matters here too: entry cameras placed around eye level or slightly above it typically give better night identification than high soffit mounts that only see the tops of heads.
-
Start near 15 FPS: use it as a baseline for most entries and general coverage views.
-
Aim fill light away from the lens: keep porch lights and soffit lights from flaring the sensor.
-
Test WDR in context: verify whether it improves or hurts the night profile in mixed light.
-
Validate after dark: do a walk test and a vehicle test before signing off on placement.
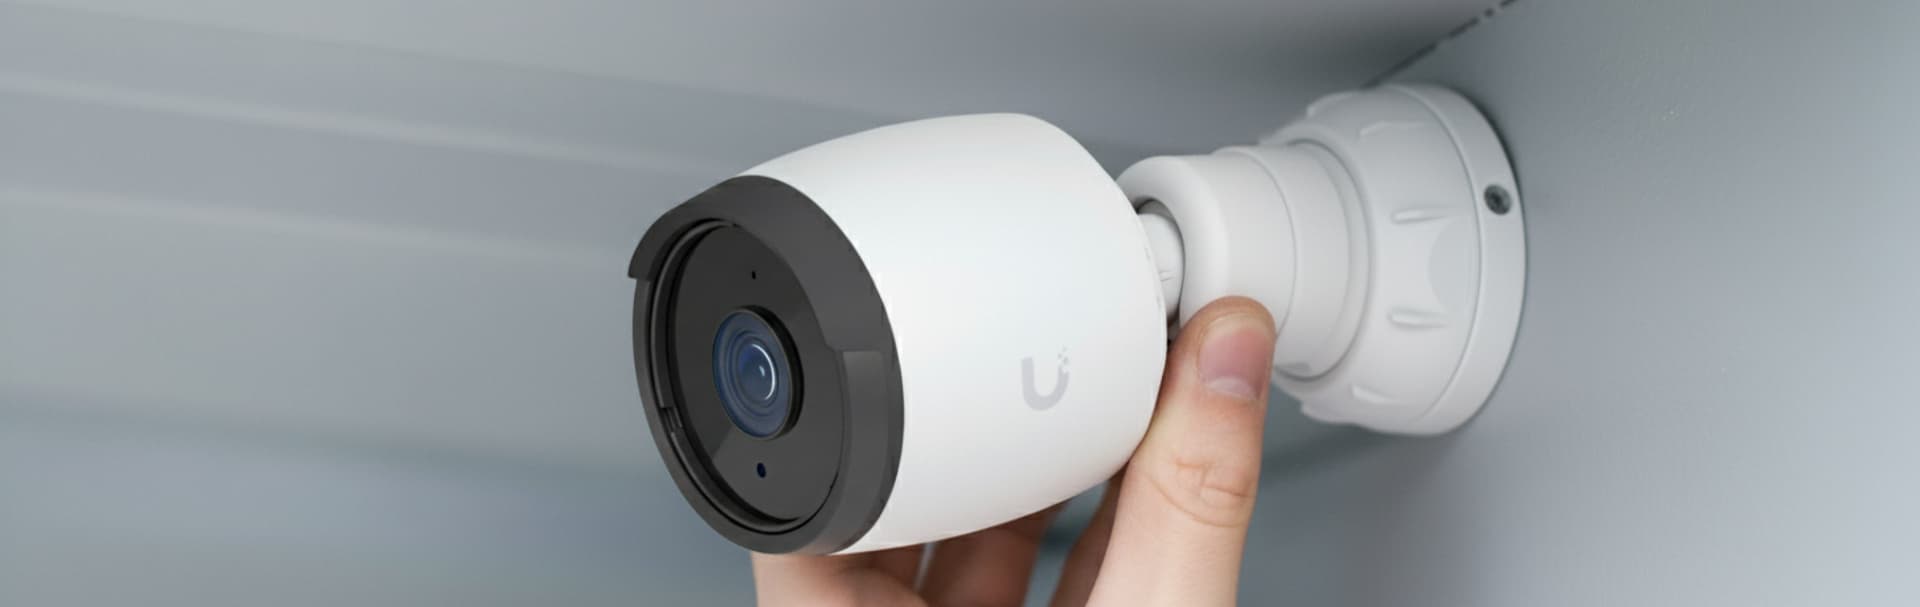
Why hardwired PoE cameras outperform Wi-Fi systems
Hardwired PoE cameras are usually the most reliable choice because they remove battery maintenance, reduce dependence on shared wireless airtime, and keep recording more consistent when the network is busy. Wi-Fi and battery cameras still have a place, but they often involve tradeoffs in retention, uptime, and maintenance.
PoE combines power and data on one cable, which simplifies mounting and gives each camera a predictable wired connection. That matters most when you want multiple exterior cameras, continuous recording, secure remote access, or longer retention windows. Battery-powered cameras are convenient for rentals, temporary coverage, or one-off locations where cabling is not practical, but they often give up continuous capture, stronger night performance, and simpler long-term maintenance. Consumer Wi-Fi cameras also rely more heavily on subscriptions in many ecosystems, while local PoE systems give the owner more control over retention, exports, and recurring cost.
If your short list is mostly Reolink and the question is which current model fits the job, the Best Reolink cameras in 2026 roundup breaks down the lineup by PoE, floodlight, panoramic, and battery use case.
If the decision has already narrowed to Reolink's front-door lineup specifically, the Reolink Video Doorbell PoE vs WiFi comparison explains when the wired model is worth the extra cabling and when the WiFi version is the more practical retrofit.
Use solid-copper Cat6 as the default cable for most camera runs. If interoperability matters, look for ONVIF support and understand the difference between Profile S and Profile T: Profile S covers basic streaming and control, while Profile T adds modern video features such as H.264, H.265, imaging, events, metadata, and audio support. ONVIF helps with interoperability, but it does not guarantee every smart feature works identically across every recorder or VMS.
-
Use PoE for consistency: it reduces dependence on local outlets and battery swaps.
-
Prefer wired backhaul where possible: it is easier to troubleshoot than multi-camera Wi-Fi congestion.
-
Plan retention around local recording: NVR-based systems usually offer more predictable history.
-
Treat ONVIF as a compatibility layer: verify specific feature support before buying mixed-vendor equipment.
How to Calculate Security Camera Storage Requirements
Calculate security camera storage by multiplying average bitrate by time. A simple planning rule is 1 Mbps average bitrate equals about 10.8 GB per day.
That makes storage math straightforward. Four cameras averaging 4 Mb/s each produce 16 Mb/s total, which is about 2 MB/s. Over 86,400 seconds per day, that is about 172.8 GB per day. Over 14 days, the total is about 2,419 GB, or roughly 2.4 TB. For a 2026 planning example, that 4 Mb/s baseline is reasonable for a tuned 2K stream using H.265, but exact numbers still depend on scene noise, frame rate, lighting, and whether the camera records continuously or only on motion or smart detections.
Use storage per day (GB) ≈ average bitrate (Mb/s) × 10.8. Then multiply by camera count and retention days, and add headroom for scene changes and firmware updates.
| Average bitrate | Approx GB per day | 14 days | 30 days |
|---|---|---|---|
| 2 Mbps | 21.6 GB | 302 GB | 648 GB |
| 3 Mbps | 32.4 GB | 454 GB | 972 GB |
| 4 Mbps | 43.2 GB | 605 GB | 1.30 TB |
Continuous recording belongs on at least one identification view at each critical entry. Broader context views can often move to smart-detection or motion-only recording once the scene is stable. That gives you evidence where it matters without overspending on storage.
Which AI features actually matter?
The most useful camera analytics are the ones that reduce review time and cut false alerts. For most homes and small businesses, that means person detection, vehicle detection, line crossing, and well-defined activity zones before anything more ambitious.
Advanced analytics are improving quickly, but they should be described precisely. In current prosumer and enterprise platforms, features such as license plate recognition, face workflows, audio classification, and natural-language search may depend on specific camera models, recorder capabilities, or optional AI hardware. Treat those as feature tiers, not as default behavior across every smart camera. If the project depends on LPR, line crossing, loitering, or a particular face workflow, verify whether the intelligence lives on the camera, on the recorder, or in an add-on processor before you buy.
- Begin with person and vehicle detection: these usually provide the most practical value.
- Use line crossing selectively: it is helpful where direction or perimeter events matter.
- Reserve LPR for controlled scenes: angle, distance, and lighting determine whether it works well.
- Document sensitive analytics carefully: facial recognition and loitering rules should follow a clear policy.
Consumer vs prosumer vs enterprise security cameras
Consumer, prosumer, and enterprise camera systems solve different problems. The right tier depends on whether you value convenience, local control, or integration depth.
| Tier | Typical fit | Strengths | Tradeoffs |
|---|---|---|---|
| Consumer | Apartment, one or two cameras, quick DIY | Fast setup, low upfront effort, app-driven | Subscription pressure, weaker retention control, more Wi-Fi dependence |
| Prosumer | Homeowner or small office wanting local recording | PoE options, local storage, better exports, fewer recurring fees | More planning required, not every feature is automatic |
| Enterprise | Multi-door, multi-site, policy-heavy environments | Deeper analytics, access-control tie-ins, stronger auditing and scale | Higher upfront cost, more commissioning and governance |
For many Westchester homes and small businesses, prosumer systems offer a practical middle ground: local recording, hardwired cameras, clear exports, and secure remote access without the complexity of a larger enterprise platform. Consumer gear can still work well for small or temporary needs. Enterprise systems become appropriate when access control, compliance, multi-site management, or advanced analytics are core requirements.
How much does a security camera system cost in 2026?
In 2026, a professionally installed 4-camera PoE security system typically costs between $3,000 and $8,000, while a basic DIY setup usually ranges from $600 to $3,000. Cable paths, retention, lighting, conduit, UPS requirements, and integration work often affect the total more than camera count alone.
| Project type | Budgetary range | Usually includes | What pushes it higher |
|---|---|---|---|
| DIY / consumer cloud setup | $600 to $3,000 | Basic Wi-Fi cameras, mounts, app setup | Subscriptions, weak Wi-Fi, poor night scenes, limited exports |
| Prosumer 4-camera PoE + local storage | $1,500 to $4,500 | PoE cameras, switch, gateway or small recorder, simple retention plan | Long cable paths, outdoor protection, better optics, more storage |
| Professional 4-camera PoE + local NVR | $3,000 to $8,000 | PoE cameras, recorder, clean setup, documentation, tuned notifications | Finished-wall fishing, conduit, UPS, after-hours labor, tighter ID requirements |
| Integrated commercial 8-camera system | $8,000+ | Longer retention, stronger optics, policy setup, access-control tie-ins | Lifts, trenching, LPR, multi-site rollout, complex roles and audit needs |
As of March 6, 2026, current Ubiquiti store pricing provides a useful hardware reference point: G5 Turret Ultra at $129, G5 Bullet at $129, G6 Turret at $199, Cloud Gateway Max at $279, and UNVR at $299. Those are equipment prices, not installed project totals.
Best Security Camera Placement Patterns
The best security camera placement patterns pair a wide context view with a tighter identification view at each critical approach. In practice, these layouts usually work better than a generic "one camera per corner" approach because they preserve both context and detail.
Front door: [Street] -> [Porch Cam at eye level] -> [Entry] with the lens slightly off-axis so the door opening and porch light do not blow out the face.
Driveway: [Street] -> [Wide Overview] + [Narrow ID view at apron or walkway] so you capture both context and a usable face or plate.
Backyard: [Fence line] -> [Door] so the camera sees both approach and the latch area where hands and faces come closer to the lens.
How to Tune Security Camera Notifications
Tune notifications so alerts correspond to events someone will actually act on. Good notifications are rare, intentional, and focused on people, vehicles, and controlled zones instead of every pixel change.
Start with quiet defaults, then add alerts only where someone will actually act on them.
- Use smart detections first: prefer person and vehicle detection where available.
- Tighten the active zone: exclude roads, trees, and reflective surfaces.
- Schedule for action: run alerts during after-hours periods instead of all day.
- Route to roles, not people: send notifications to shared responsibility, not a random list of individuals.
For homes, a front-door person alert late at night may be useful. Repeated driveway-shadow alerts caused by passing headlights usually are not. For businesses, role-based routing and a periodic review of alert volume usually matter more than enabling every available detection.
What privacy and policy decisions should be documented?
Camera policy should be simple enough to follow consistently. Decide what gets recorded, who can view or export it, how long it stays available, and where privacy boundaries sit before the project is considered complete.
Document privacy zones, signage decisions, export permissions, and retention targets. Avoid microphones in sensitive locations unless there is a clear operational reason and it is lawful for that site. If the system supports facial workflows, loitering rules, or other higher-sensitivity analytics, document why they are enabled and who is allowed to review them.
DIY or professional install?
DIY is reasonable when the goal is a small number of cameras, light retention expectations, and simple app access. Professional design is usually worth it when the system needs identification-grade views, hardwired reliability, longer retention, or clean documentation for future support.
A common problem is mounting cameras too high, making every view too wide, and later discovering that the footage explains the event without identifying the person clearly. Planning the layout before buying equipment usually prevents that result.
FAQ
How many cameras do I need?
Cover entries and common approaches first, then add overview coverage. Four to eight cameras is common for a typical home, but larger properties vary widely.
Do I need 4K everywhere?
No. Higher resolution helps, but lens choice, mounting height, and scene control usually matter more. Use higher resolution where identification truly depends on it.
Cloud or local storage?
Cloud is convenient for small systems. Local recording is usually better when you want predictable retention, clean exports, and less dependence on subscriptions.
Does ONVIF guarantee every feature will work?
No. ONVIF helps with interoperability, but advanced analytics and some smart-search features still depend on the specific camera, recorder, and software stack.
Checklist
- Mix context views with tighter identification views
- Match lens size to distance instead of relying on digital zoom
- Test night performance after dark, not only during the day
- Use PoE with switch wattage headroom where reliability matters
- Size storage from bitrate math and retention goals
- Tune notifications so alerts stay actionable
- Document privacy zones, roles, exports, and retention targets
Case study: night clarity without floodlights
A Bedford client wanted clearer night video without adding bright floodlighting. We placed a turret camera at the front door at head height, added a gentle 3000K porch sconce aimed away from the lens, and tuned exposure to preserve faces under mixed light. A second longer-lens view covered the driveway choke point. The result was clearer night identification, quieter notifications, and a front entry that still felt comfortable to live with.
References
- ONVIF Profile T. Checked March 6, 2026.
- Ubiquiti Help Center: UniFi Protect Cameras - AI Detections and Facial Recognition. Checked March 6, 2026.
- Ubiquiti Help Center: How UniFi Protect Protects Your Data. Checked March 6, 2026.
- Ubiquiti Store: UNVR. Checked March 6, 2026.
Next steps
Need help designing the right mix of camera types, lenses, and retention? Plan a security project.
Plan the project with a site visit
Confirm wiring, equipment, placement, and installation scope before hardware is locked in.