


- When Should You Choose Cat6 vs. Cat6A?
- Essential Tools and Materials for Cat6 Installation
- Planning a Cat6 Installation Route
- When to Use Plenum (CMP) vs. Riser (CMR) Cable
- Cable Pulling Techniques to Prevent Damage
- How Do You Fish Ethernet Cables Through Finished Walls?
- Correct Cat6 Punch-Down Procedure
- Should You Use RJ45 Plugs or Keystone Jacks for In-Wall Runs?
- How Do PoE, Wi-Fi 7, and Multi-Gig Speeds Affect Cable Choice?
- When Should You Stop Using Copper and Run Fiber Instead?
- How Much Does Cat6 Installation Cost in 2026?
- Common Causes of Cat6 Installation Failures
- Testing and Labeling Finished Ethernet Runs
- FAQs
- Checklist
- References and check dates
- Next steps
Install solid-copper Cat6 for most room drops, use Cat6A selectively for harder-to-revisit multigig or PoE runs, and terminate to keystones and a patch panel.
- Cat6 is still the default for ordinary room drops, TVs, desks, and many 2.5 GbE-class devices.
- Cat6A is worth using selectively for backbones, premium Wi-Fi 7 access point drops, denser bundles, and harder-to-reopen paths.
- For in-wall runs, buy solid bare copper cable, not CCA, and terminate to keystone jacks plus a patch panel.
- A basic wiremap test is the minimum. Clean labels, a port legend, and service loops are what make the install supportable later.
- In 2026, realistic planning ranges are about $150 to $300 per professional drop and roughly $185 to $204 per 1000-foot box of solid-copper Cat6 CMR cable.
At a glance:
-
Use Cat6 for standard room drops (desks, TVs, printers) and Cat6A selectively for backbones, premium AP ceilings, and hard-to-reopen paths
-
Buy solid bare copper cable only — never CCA — and terminate to keystone jacks plus a patch panel
-
Use CMR-rated cable for in-wall riser paths and CMP-rated cable for plenum spaces above drop ceilings
-
Test every run with at least a wiremap tester and label both ends with matching room codes
-
Budget roughly $185–$204 per 1000 ft box of Cat6 CMR and $150–$300 per professional drop
When Should You Choose Cat6 vs. Cat6A?
Cat6 is sufficient for standard room drops, while Cat6A is required for 10 GbE backbones, dense bundles, and high-draw 802.3bt PoE applications.
Cat6 remains the practical default for bedrooms, TVs, desks, printers, and many clean residential access point runs. Cat6A earns its extra cost when the cable is acting more like infrastructure than an outlet: rack uplinks, floor-to-floor backbones, premium Wi-Fi 7 access point drops, denser cable bundles, and any path you do not want to reopen in two years.
Wi-Fi 7 does not automatically require Cat6A on every drop. As of May 2026, mainstream Wi-Fi 7 access points such as Ubiquiti's UniFi U7 Pro ($189) still use a 2.5 GbE uplink and PoE+, while models like the U7 Pro XG ($199) add 10 GbE uplink support and higher-end enterprise APs such as Juniper's AP47 move into 802.3bt. In practice, Wi-Fi 7 makes selective Cat6A more valuable on the few links that carry the heaviest traffic or are hardest to revisit.
| Scenario | Use Cat6 | Use Cat6A |
|---|---|---|
| Bedroom, TV, printer, ordinary desk | Yes | Usually no |
| Ceiling AP on a short clean residential run | Often yes | Sometimes |
| Premium AP drop you do not want to reopen | Sometimes | Preferred |
| Rack uplink or floor-to-floor backbone | Sometimes | Preferred |
| 10 GbE to 100 m | No | Yes |
| Denser bundles or heavier 802.3bt planning | Less margin | Better margin |
Essential Tools and Materials for Cat6 Installation
A reliable Cat6 installation requires solid bare copper bulk cable, a 110-style punch-down tool, keystone jacks, a patch panel, and a wiremap tester.
Buy installer-grade materials first and fancy accessories second. The cable, terminations, and tester matter more than color-matched tools or cheap connector kits. For in-wall work, use solid conductors and terminate to keystones or a patch panel. Pre-made patch cables and pass-through RJ45 plugs are not the right foundation for permanent links.
| Item | Recommendation | 2026 benchmark |
|---|---|---|
| Bulk cable | Cat6 solid bare copper, 23 AWG | $185–$204 per 1000 ft CMR box |
| Bulk cable for premium runs | Cat6A solid bare copper | $285–$310 per 1000 ft CMR box |
| Termination | Cat6/Cat6A keystone jacks + 110-style patch panel | T568B or T568A — pick one, stay consistent |
| Testing | Wiremap tester minimum; certifier ideal | Klein VDV526-100 at $30–$40; certifiers $500+ |
| Switching | PoE switch with wattage headroom | Size for current APs plus one future device |
| Labels | Printed labels and a port legend | Match wall jack codes to patch panel ports |
These are the core materials for a clean residential or small-office install.
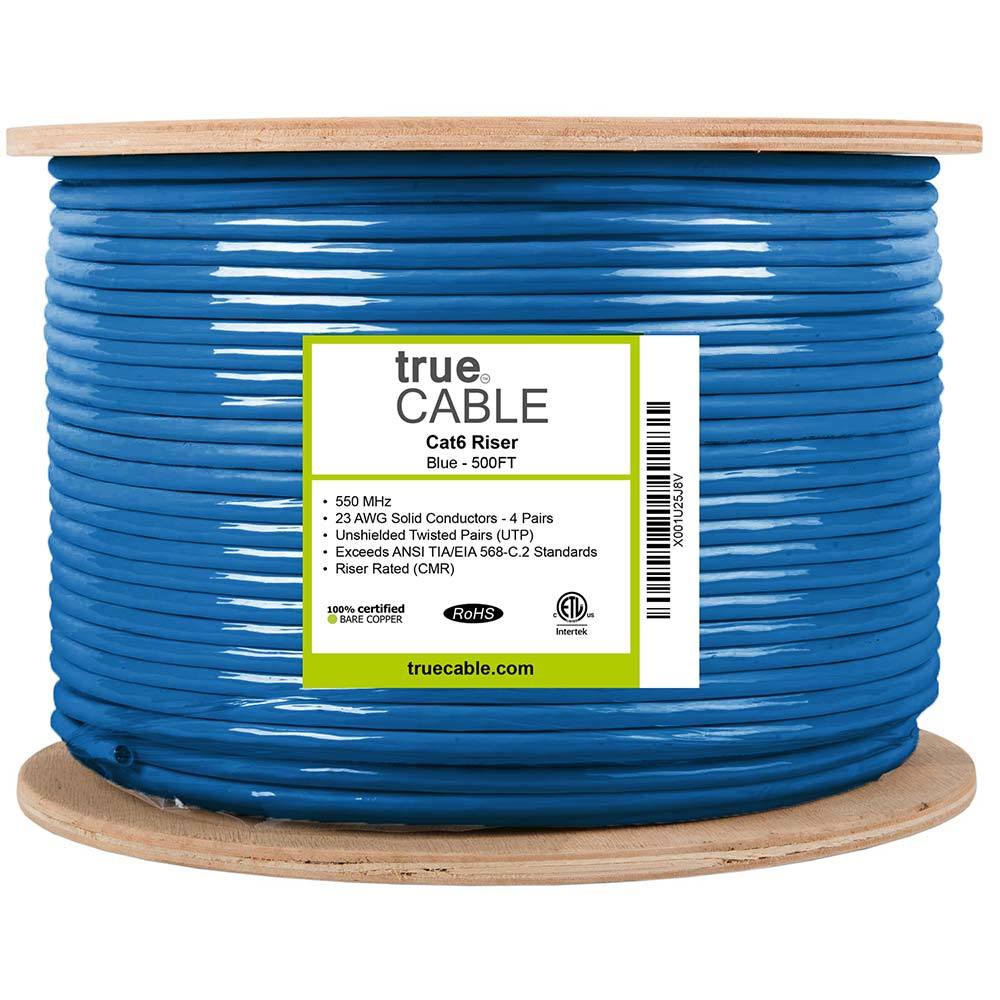
This card highlights the product details most relevant to this section.
- 1000 ft riser-rated Cat6 bulk cable for in-wall structured cabling
- 23AWG solid bare copper conductors suitable for PoE and data runs
- CMR jacket and ETL listing for residential and commercial riser use
This card highlights the product details most relevant to this section.
- 10G‑rated Cat6A with larger bend radius
- Solid copper conductors for higher PoE loads
- Riser-rated bulk cable suitable for structured cabling backbones
This card highlights the product details most relevant to this section.
- 12 ports, Cat6, supports 10G Ethernet (TIA/EIA 568-C.2 compliant)
- Works in standard 19-inch racks, wall-mount brackets, and cabinets
- Includes D-rings and cable ties; punch-down type termination
- Label strips for port identification
Planning a Cat6 Installation Route
Centralize all permanent home runs to a single media panel and avoid routing low-voltage cables parallel to AC power lines to prevent interference.
Start with a floor plan and mark where people actually work, watch TV, join calls, or mount cameras. Then mark the central rack or media panel with ventilation, power, and a realistic path to attic, basement, or crawl routes. Every permanent run should home-run back to that point.
- Home-run each outlet to a central rack or patch-panel location
- Reserve ceiling drops for access points before the painter closes the room
- Plan one or two spare runs at TV walls, offices, and premium AP locations
- Confirm whether the route needs riser, plenum, exterior-rated cable, bushings, or fire-stopping
- Keep low-voltage away from long parallel runs beside AC mains
Leave a generous service loop where future retermination is likely. Above ceiling APs and at accessible rack zones, a short extra coil is cheaper than a re-pull.
When to Use Plenum (CMP) vs. Riser (CMR) Cable
Use CMP-rated plenum cable in air-handling spaces above drop ceilings and inside HVAC returns. Use CMR-rated riser cable for standard in-wall runs and vertical paths between floors.
The abbreviations on the cable jacket are NEC fire-safety ratings, not performance grades. Both CMP and CMR can carry the same Cat6 or Cat6A data and PoE performance. The difference is how the jacket behaves in a fire:
- CMP (Plenum): Low-smoke, low-flame jacket required in any space used for air circulation — drop-ceiling voids, raised-floor plenums, and HVAC duct returns. Using CMR in these spaces violates fire code.
- CMR (Riser): Standard flame-retardant jacket rated for vertical runs between floors and ordinary in-wall paths. Sufficient for most residential and small-office installs where the cable is not in an air-handling space.
- CM (General purpose): Minimum-rated communications cable. Acceptable only for horizontal runs within a single floor in some jurisdictions. CMR is the safer default.
If you are unsure whether a ceiling void counts as a plenum space, assume it does and use CMP. The cost premium over CMR is small compared to a code violation. For a deeper breakdown, see the plenum vs riser Ethernet cable guide.
Cable Pulling Techniques to Prevent Damage
Maintain a minimum bend radius of four times the cable diameter, use friction-reducing bushings, and avoid pulling taped bundles forcefully.
Plan routes through basements, closets, crawlspaces, and attics first because those spaces let you move cable with less finish damage. When fishing finished walls, work toward interior partitions before exterior walls, and expect plaster, fire blocking, and masonry to slow you down.
- Tape the cable head smoothly so it does not snag on framing or insulation
- Use fish tape or rods plus a pull string for future additions
- Maintain roughly
4xcable diameter as the minimum bend-radius rule unless the manufacturer specifies more — for typical Cat6 with a 6 mm outer diameter, that works out to about1 inch - Bending tighter than this threshold alters the geometry of the twisted pairs and introduces crosstalk
- Use J-hooks, low-voltage staples, or supports that do not crush the jacket
- Protect raw metal and framing edges with bushings, grommets, or sleeves
How Do You Fish Ethernet Cables Through Finished Walls?
Use a deep-scan stud finder and small probe holes to map fire blocks before cutting low-voltage brackets to minimize drywall finish damage.
Finished plaster walls, layered remodels, old insulation, chimney chases, and solid fire blocks can turn a one-hour run into a half-day problem. That is normal — every finished-wall retrofit is slower than an open-stud install. The goal is not speed. The goal is a clean, supportable path with minimal finish damage.
- Use a deep-scan stud finder and small probe holes before opening a full low-voltage bracket cutout
- Flexible drill bits help when fire blocks or offset framing interrupt the cavity
- Use a chain or weighted pull in stubborn cavities so you can hear and guide the drop
- Put outlets where the furniture or desk will actually live, not where the cavity happened to be easy
If the route is more about access than cable, get the path scoped before you commit to a DIY pull. A quick site visit usually saves more than it costs.
If you are opening finished walls, these are the tools that usually earn their keep fastest.
This card highlights the product details most relevant to this section.
- 13-sensor stud finder that shows stud center and edges simultaneously
- Useful when older walls are too inconsistent for basic stud finders
- Better fit than generic capacitive tools for retrofit wall work
This card highlights the product details most relevant to this section.
- Six 5-foot glow rods assemble into a 30-foot low-flex pulling set for longer wall and ceiling routes
- Glow finish improves visibility in attics, soffits, and dim cavities
- Better fit than bargain rod kits when you need repeatable threading through finished spaces

This card highlights the product details most relevant to this section.
- Single-gang low-voltage brackets for Ethernet, coax, HDMI, and speaker cable terminations
- Flush old-work style bracket for clean wall plate installs
- Five-pack useful for rough-in planning across office, TV, and network locations
Correct Cat6 Punch-Down Procedure
Strip the jacket without nicking conductors, maintain factory twists up to the jack, and seat wires into T568B color slots using an impact tool.
For permanent links, terminate to keystone jacks at the wall and to a patch panel at the rack. Use T568B in most U.S. installs unless you already standardized on T568A. Consistency matters more than the choice.
- Strip the jacket. Remove about 2 inches of outer jacket without nicking the conductor insulation.
- Clear the spline. Remove the spline or separator if the cable includes one.
- Preserve the twists. Untwist no more than
0.5 inches— untwisting further degrades crosstalk performance and can cause split-pair faults. - Seat the conductors. Lay each conductor into the
T568Bcolor slots on the keystone. - Punch down. Strike straight down with a sharp
110blade so the wire seats fully and the excess is trimmed cleanly. - Verify. Check conductor order before snapping the jack closed or landing the panel side.
Do not crimp in-wall solid cable to loose RJ45 plugs unless you have a very specific reason and the connector is matched to that exact cable diameter. Using RJ45 plugs on solid-core wire often leads to broken connections over time because the solid conductor does not grip the plug's contact reliably. Keystones and patch panels are more forgiving, more serviceable, and more professional.
Should You Use RJ45 Plugs or Keystone Jacks for In-Wall Runs?
Terminate permanent in-wall ethernet runs to keystone jacks and patch panels. RJ45 plugs are strictly for temporary patch cables and device leads.
Keystone-plus-patch-panel termination gives you cleaner strain relief, easier service, simpler labeling, and fewer failures from awkward connector movement. RJ45 plugs are fine for patch leads and some device-specific situations. They are not the default best practice for structured in-wall cabling.
- Use keystones at the room side
- Use a patch panel at the rack side — the home network rack setup guide covers layout and labeling
- Use short factory patch cords between the patch panel and switch
- Keep terminations matched to the cable category and conductor size
For termination work, these are the tools and jacks that consistently produce clean, long-lasting results.
This card highlights the product details most relevant to this section.
- 90-degree punch-down Cat6 keystone sized for 23-24 AWG solid copper conductors
- Supports PoE, PoE+, and PoE++ up to 100W with UL and ETL compliance claims
- Includes IDC caps and works with standard wall plates and keystone patch panels
This card highlights the product details most relevant to this section.
- Spring-loaded impact punchdown tool with hi/low force settings for 66 and 110 terminations
- Terminates and cuts in one step and includes pick and spudger in the handle
- Better fit than disposable punch tools when you are terminating real patch panels and keystones

This card highlights the product details most relevant to this section.
- Verifies pinout and continuity on Ethernet runs
- Remote terminator for one‑person testing
- Useful when validating new backhaul runs
How Do PoE, Wi-Fi 7, and Multi-Gig Speeds Affect Cable Choice?
Heavy PoE demands and multi-gigabit uplinks generate heat and require greater bandwidth, making Cat6A the safer choice over standard Cat6 cable.
Power over Ethernet should be planned early because the switch, cable bundle, and endpoint all affect the result. In 2026, mainstream Wi-Fi 7 access points like the Ubiquiti U7 Pro ($189) still sit in the 2.5 GbE and PoE+ class. The U7 Pro XG ($199) adds 10 GbE uplink support, and higher-tier enterprise APs increasingly lean on 802.3bt. That is where cable heat, bundle density, and pathway difficulty become part of the cable decision.
- For many short, clean AP runs, Cat6 is still fine
- For premium AP ceilings, backbones, or denser powered bundles, Cat6A gives better margin
- Keep total channel length within
100 mincluding patch leads - For exterior powered devices, use the right cable jacket and protect against surge exposure
For installs involving higher-end Wi-Fi 7 access points or heavier PoE requirements, these products support that upgrade path.

This card highlights the product details most relevant to this section.
- Wi-Fi 7 (802.11be) tri-band with 2.4, 5, and 6 GHz radios
- 2x2 MIMO on each band, with 6 GHz support for newer client devices
- Ceiling-mount form factor that works best with wired backhaul and central placement
- 1x 2.5 GbE uplink that works with modern PoE+ switching
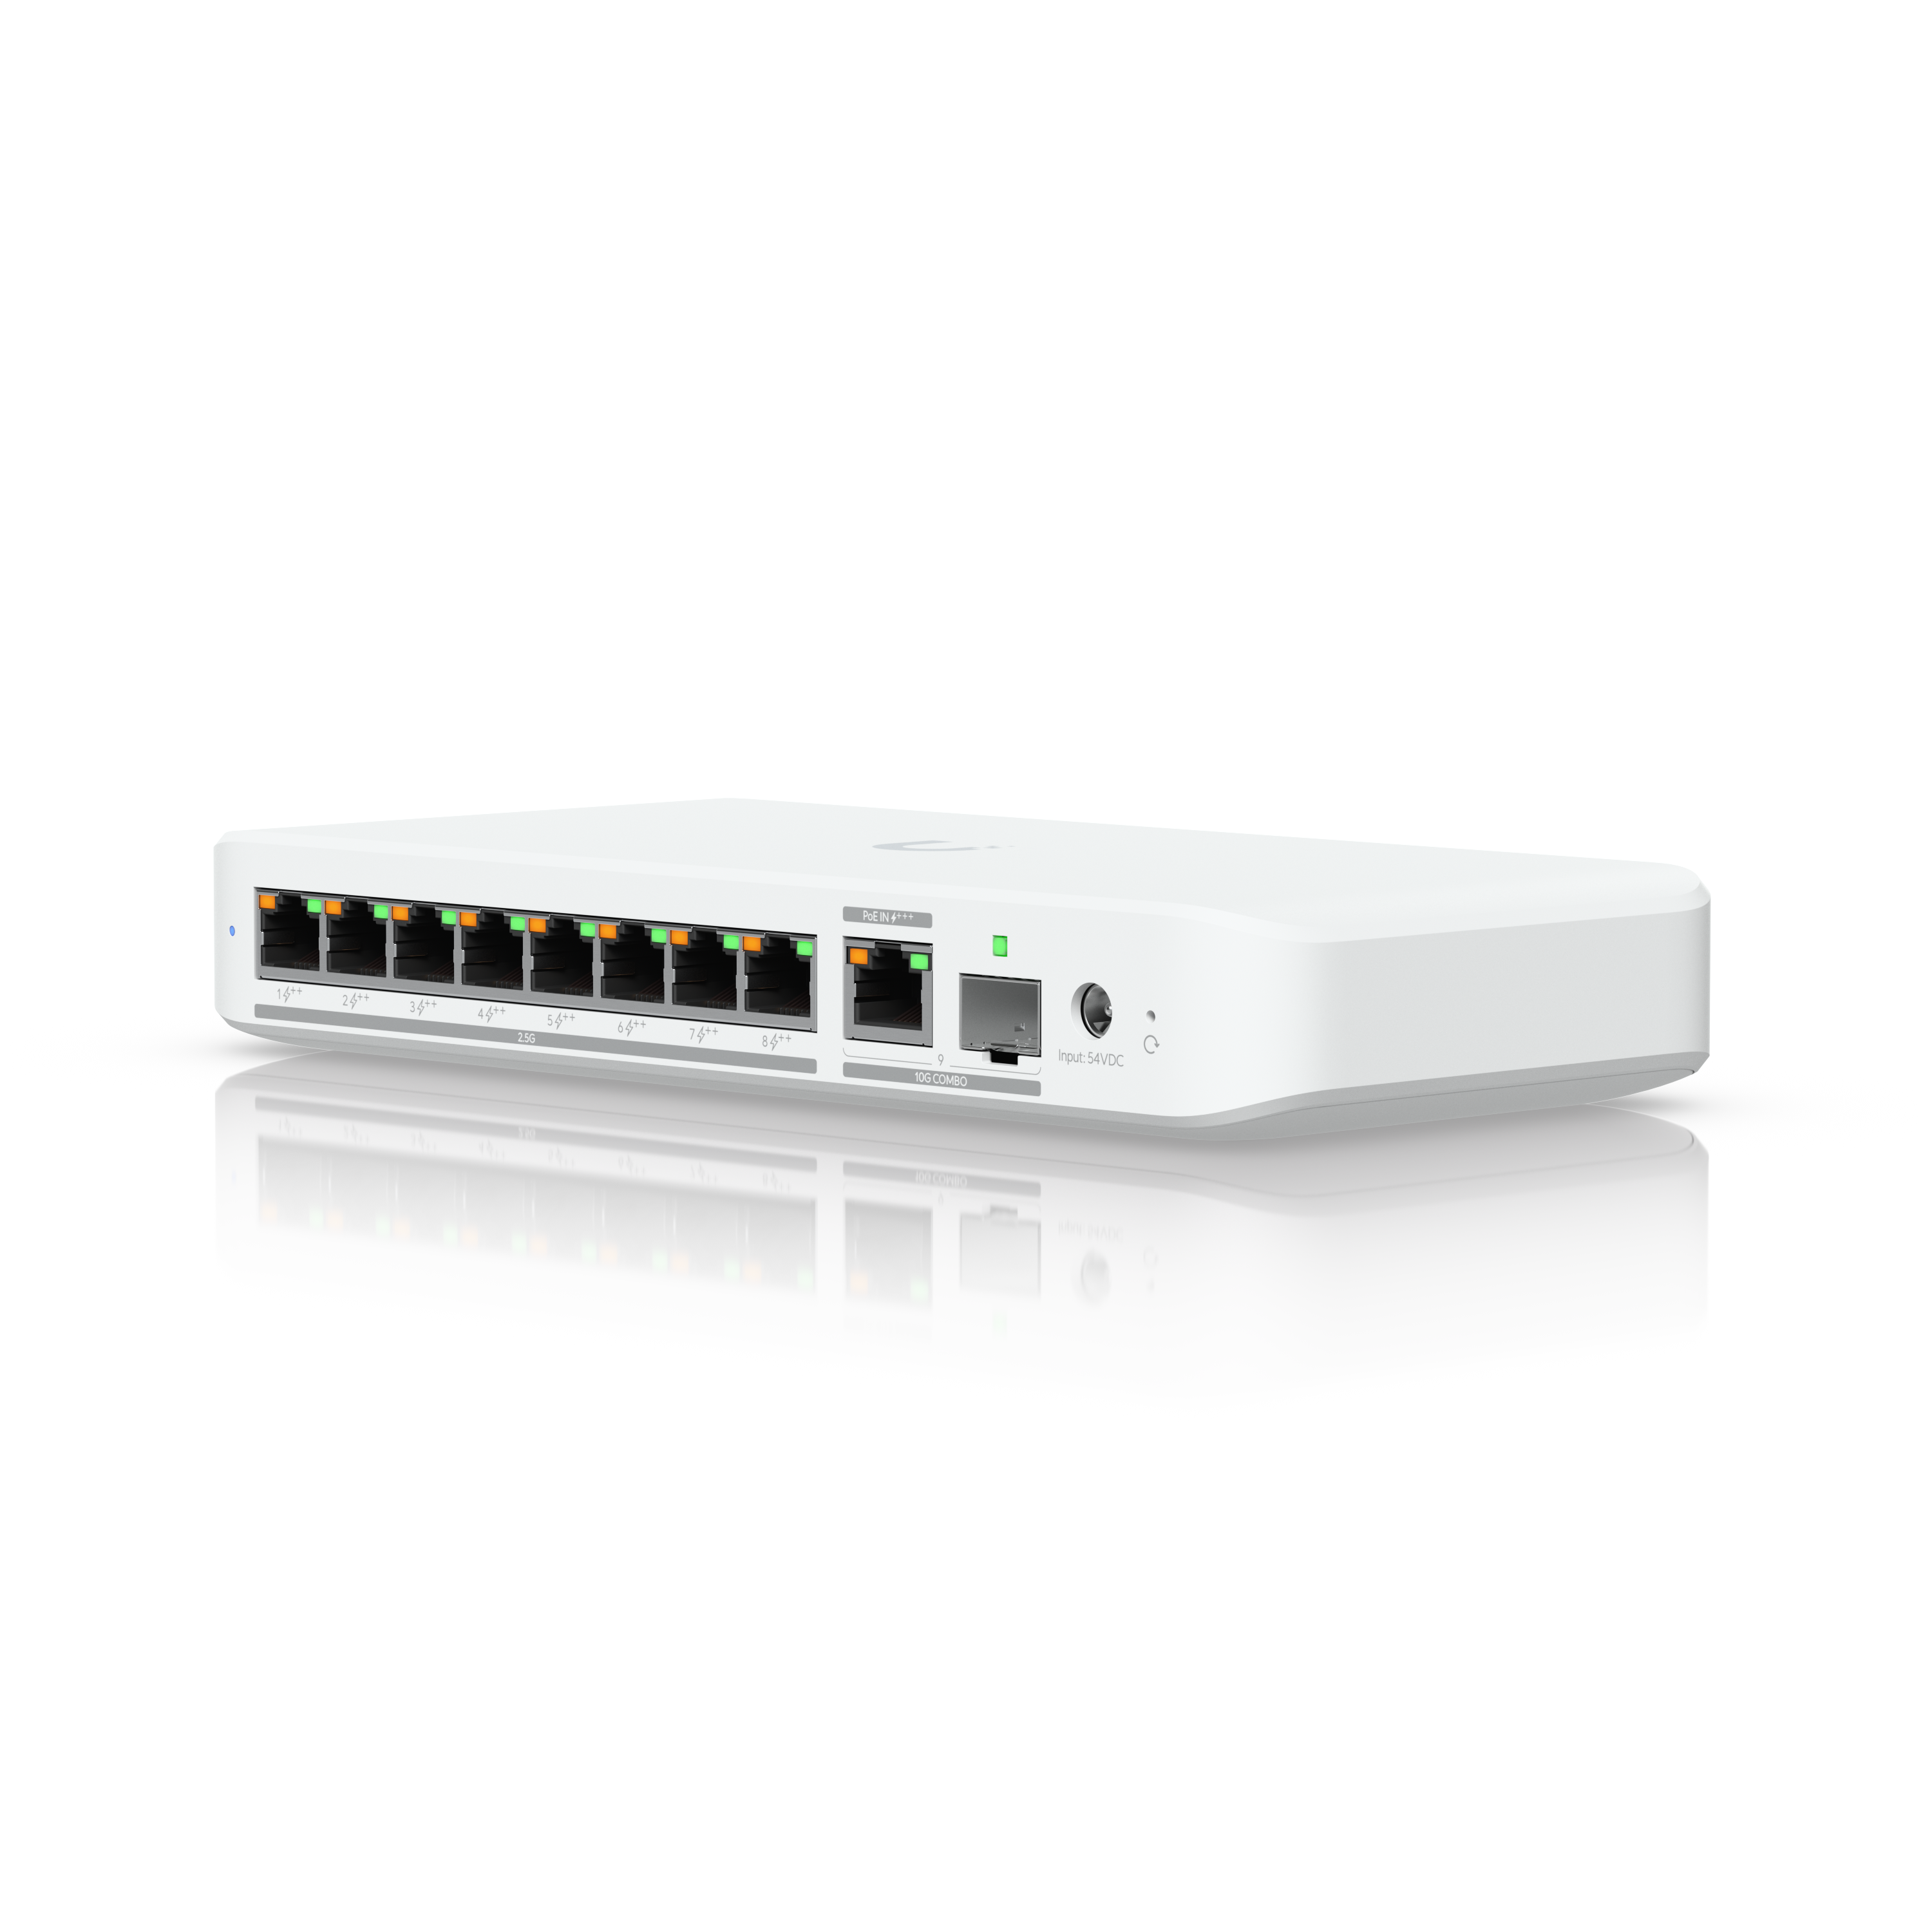
This card highlights the product details most relevant to this section.
- 8-port 2.5 GbE switching
- PoE++ output for newer UniFi edge devices
- 10 GbE RJ45/SFP+ combination uplink for cleaner upstream growth

This card highlights the product details most relevant to this section.
- Wi-Fi 7 (802.11be) tri-band with 6 spatial streams
- 10/5/2.5/1 GbE RJ45 uplink for higher-end multi-gig edge designs
- Natural step up when fast local traffic or a 10G core makes 2.5G feel short-lived
- Official Ubiquiti MSRP is $199 as of May 28, 2026
When Should You Stop Using Copper and Run Fiber Instead?
Switch to fiber optic cable for network runs over 100 meters, outdoor building-to-building links, or paths with high electrical interference.
Copper is still the right answer for most horizontal room drops. Fiber is the better answer when the path is too long for structured copper, when lightning or ground potential is part of the risk, or when the link is acting like backbone infrastructure rather than a device outlet.
- Use Cat6 or Cat6A for room drops, APs, TVs, and desks — see the shielded vs unshielded guide if you are deciding between UTP and STP
- Use Cat6A for many rack uplinks and premium copper multigig links under
100 m - Use fiber for detached garages, outbuildings, long MDF-to-IDF links, and electrically noisy paths
How Much Does Cat6 Installation Cost in 2026?
Professional Cat6 drops average $150 to $300 each depending on wall access. DIY installations cost roughly $0.20 per foot for bulk materials.
The structure matters more than the raw cable length. A single easy drop through an unfinished basement might take a couple of hours. A finished-wall retrofit through plaster, multiple floors, and blocked cavities can take a day or more for only a few drops — costs balloon quickly when fire blocks or plaster-over-lath construction is involved.
- Current solid-copper Cat6 CMR benchmark:
$185–$204for a1000 ftbox depending on vendor - Basic DIY tool budget for a decent punch-down tool, stripper, labels, and tester: about
$150-$250 - Straightforward grouped professional drops: often start around
$150-$250each - Harder retrofits, isolated additions, patching risk, or Cat6A-heavy work: often move toward
$200-$350+per drop
Common Causes of Cat6 Installation Failures
Network failures typically stem from using copper-clad aluminum cable, mixing T568A and T568B pinouts, or crushing jackets with tight staples.
- Buying
CCAinstead of solid bare copper - Mixing
T568Aon one end andT568Bon the other - Untwisting too much at the jack — keep it under
0.5 inches - Running long parallel paths beside AC mains
- Crushing cable with tight zip ties or staples
- Skipping labels and assuming you will remember the ports later
Do not use CCA for in-wall structured cabling
Copper-clad aluminum (CCA) cable has up to 55% higher electrical resistance than solid copper. That resistance causes critical voltage drops and dangerous heat generation when powering PoE devices like Wi-Fi 7 access points. Fluke notes that CCA cable does not have a valid NEC safety listing and cannot legally be installed where CM, CMR, or CMP-rated communications cable is required. CCA is a fire hazard under sustained PoE loads. Buy solid bare copper only.
Testing and Labeling Finished Ethernet Runs
Verify pin order, shorts, and opens using a wiremap tester, then label every wall jack and patch panel port with a matching alphanumeric room code.
At minimum, use a basic wiremap tester to verify pin order, opens, shorts, and split-pair problems. A certifier is better when the job needs formal documentation or performance validation, but even a small residential install deserves a pass-fail check on every drop.
| Tester result | Likely cause | Solution |
|---|---|---|
| Split pair | Conductors untwisted too far or crossed between pairs | Reterminate the jack with correct pair grouping |
| Open circuit | Wire not punched deep enough or conductor broken during pull | Repunch the affected pin or reterminate |
| Short | Two conductors touching — nicked insulation or crushed jacket | Inspect the termination, trim, and repunch |
| Miswire | T568A on one end and T568B on the other | Reterminate one end to match the other |
| Shield fault | Shielded cable with ungrounded or improperly bonded shield | Verify shield continuity and ground bond at patch panel |
- Label the wall jack and patch-panel port with the same room code — for example,
Drop 1AandDrop 1Bmatching toPanel Port 1andPanel Port 2 - Keep a port legend in the rack or media enclosure
- Record any spare drops, ceiling AP drops, and exterior device runs clearly
- Leave service loops where future retermination is realistic
FAQs
Is Cat6 enough for 10 Gb/s?
Sometimes. Fluke's current summary of TIA TSB-155 says Cat6 should handle 10GBASE-T up to 37 m, and 37-55 m depends on alien crosstalk conditions. For 10 GbE to the full 100 m, use Cat6A or fiber.
What is the maximum length for a run?
The standard channel limit is 100 m total, typically 90 m of permanent link plus 10 m combined patch leads.
Should I choose T568A or T568B?
Both are valid. In the U.S., T568B is more common. Pick one standard and keep it consistent end to end.
Do I need a certifier, or is a continuity tester enough?
A continuity or wiremap tester is the minimum for a small install. Certification is preferred when you need saved reports, warranty support, or proof that the link meets the sold performance level.
Is Cat6A required for Wi-Fi 7?
No. Many current Wi-Fi 7 access points still use 2.5 GbE and PoE+. Cat6A is the better choice for selected premium AP drops, backbones, denser bundles, and harder-to-reopen runs.
Checklist
- Plan the rack location, AP locations, and room drops before buying cable
- Use solid bare copper Cat6 or Cat6A and match the cable jacket (CMP or CMR) to the route
- Terminate permanent links to keystones and a patch panel using one wiring standard
- Test every drop with a wiremap tester before closeout and keep a port legend
- Label both wall jacks and patch panel ports with matching alphanumeric room codes
- Use Cat6A or fiber selectively where distance, heat, or replacement cost justify it
References and check dates
- Fluke Networks: 10GBASE-T field testing requirements — checked May 28, 2026
- Fluke Networks: Copper Clad Aluminum (CCA) cables — checked May 28, 2026
- Ubiquiti UniFi U7 Pro technical specifications — checked May 28, 2026
- Ubiquiti UniFi U7 Pro XG store page — checked May 28, 2026
- Juniper AP47 power requirements — checked May 28, 2026
- trueCABLE Cat6 CMR 1000 ft product page — checked May 28, 2026
- Klein Tools VDV526-100 LAN Explorer — checked May 28, 2026
Next steps
Count the drops that truly matter, separate ordinary outlets from high-value runs, and decide early which paths are too expensive to reopen. That is the difference between a clean 2026 install and a cable job that has to be redone when the network grows.
Plan the project with a site visit
Confirm wiring, equipment, placement, and installation scope before hardware is locked in.