How to Setup Your Shiny New Home Theater Receiver in 9 Easy Steps.
So, you got a home theater system? Awesome! Listening to music, playing video games or watching movies on a home theater system can be both magical and exciting. The most important thing when it comes to having a quality home theater is not only spending huge sums on buying it; properly setting it up is just as important. We will provide a step-by-step guide on how to best set up a home theater receiver.
How long will this take?
Actually, it doesn’t require long hours to set up a home theater receiver. To set it up perfectly, you’ll need about an hour in most cases.
What you need to get started
Before we go further, here is a list of what you’ll require
· Speakers
· Speaker wire
· A string or tape to measuring wire runs
· Wire cutters
· Speaker connectors
· HDMI and A/V cables
Planning:
Take note of the parts you will connect to the receiver (such as cable/satellite boxes, gaming consoles, Blu-ray players and Wii). Don’t stress yourself much on where to place your speakers, because receivers come with automatic speaker calibration, making it easier to get the perfect sound even if the speaker is not perfectly placed.
Having said that, we can now go into the step-by-step guide:
Step 1: PLACEMENT OF RECEIVER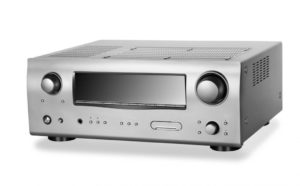
While choosing a place for your receiver, keep in mind that the receiver can overheat. Therefore it will be wise to select an area with enough space for it to breathe. Keeping the receiver in an open place such as a rack or on a cabinet is necessary because it allows you to easily connect cables to the receiver.
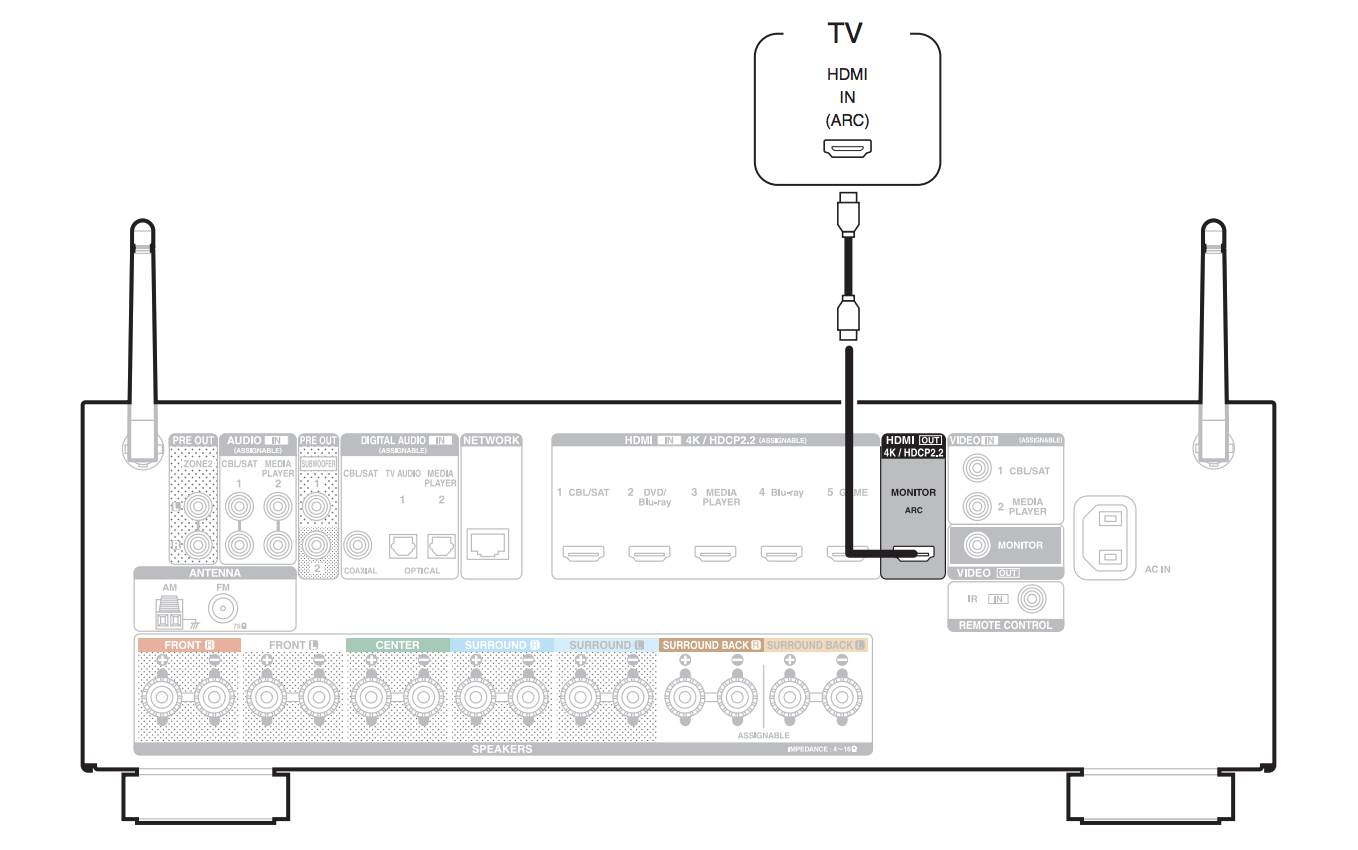
Step 2: TV CONNECTION
Once your receiver is setup, use an HDMI cable to connect your TV to it. In order to view all onscreen guides from the receiver, connect HDMI input on the TV and HDMI output to the receiver. Check if your TV and receiver support ARC (Audio Return Channel) if you intend to use an antenna. This feature makes it possible for you to hear sound through your speakers when it moves from TV to receiver through the HDMI connection. In an instance where you have an old receiver or TV, connect an optical cable between the receiver and TV to hear the sound.
Step 3: FOLLOW THE GUIDE ON THE SCREEN
Receivers don’t come with printed manuals anymore; they offer a more reliable onscreen guide. Once your receiver is connected to the TV, the instructions will appear on the screen for you to follow. Yamaha, for example, gives a simple AV setup manual app for those with tablets on the same Wi-Fi as the receiver.
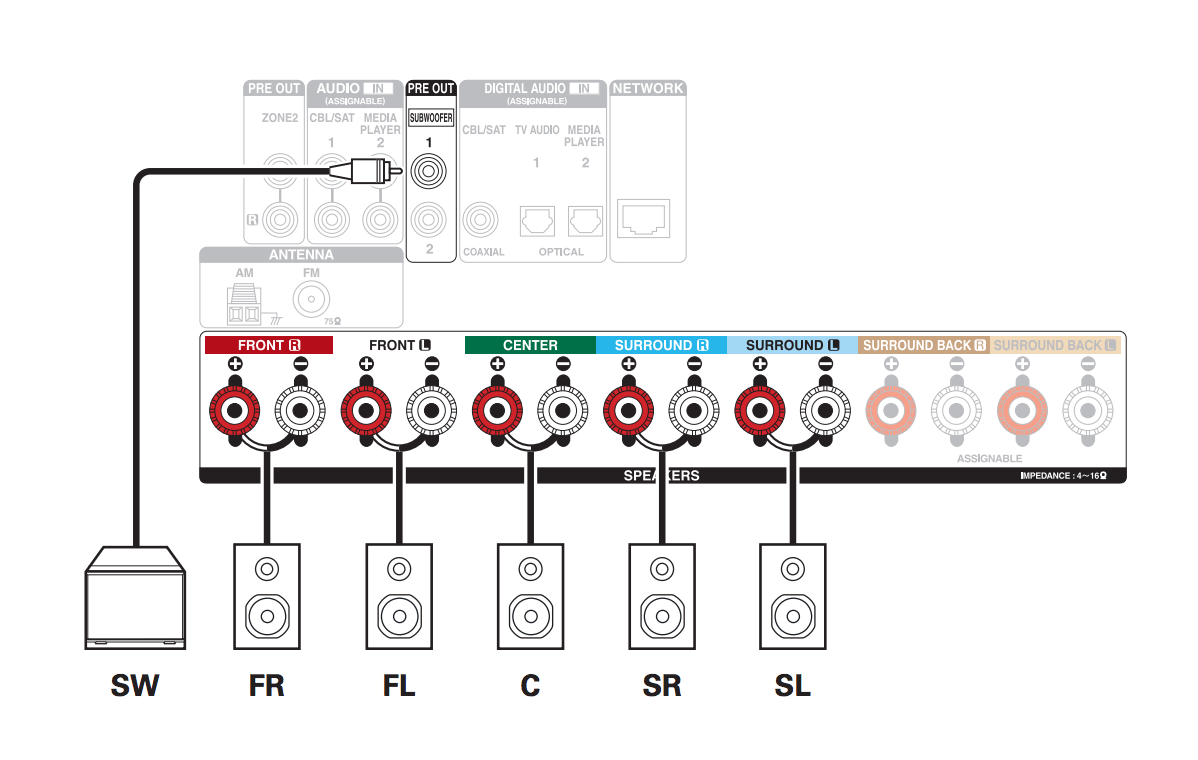
Step 4: SETTING UP THE SPEAKER:
Measure the distance of the speaker from the receiver by using a string, and accordingly cut the speaker wire. For a more secure connection, you can use speaker connectors such as banana plugs while connecting.
Step 5: SPEAKER CONNECTION
Ensure you unplug your receiver before connecting the speaker. Use wire cutters to cut off the insulation and keep the ends of the wire apart. On the receiver and speaker, you will notice labels of right and left on speaker terminals. Notice the difference in coloring on both wires. Now, connect the colors on the ends (black and red together) to the colors on the terminals. Be careful to be consistent here, to maintain the right polarity. Once that is done, use a mono RCA subwoofer cable from the output on the receiver to connect to the input of the subwoofer’s LFE.
Step 6: CONNECT THE A/V PARTS
It is recommended to use HDMI cables for connecting different components to the receiver, because they tend to transmit the best resolution of both audio and video signals, without needing additional wires. Once all connections are secured, test every source to be certain you are receiving audio and video signals.
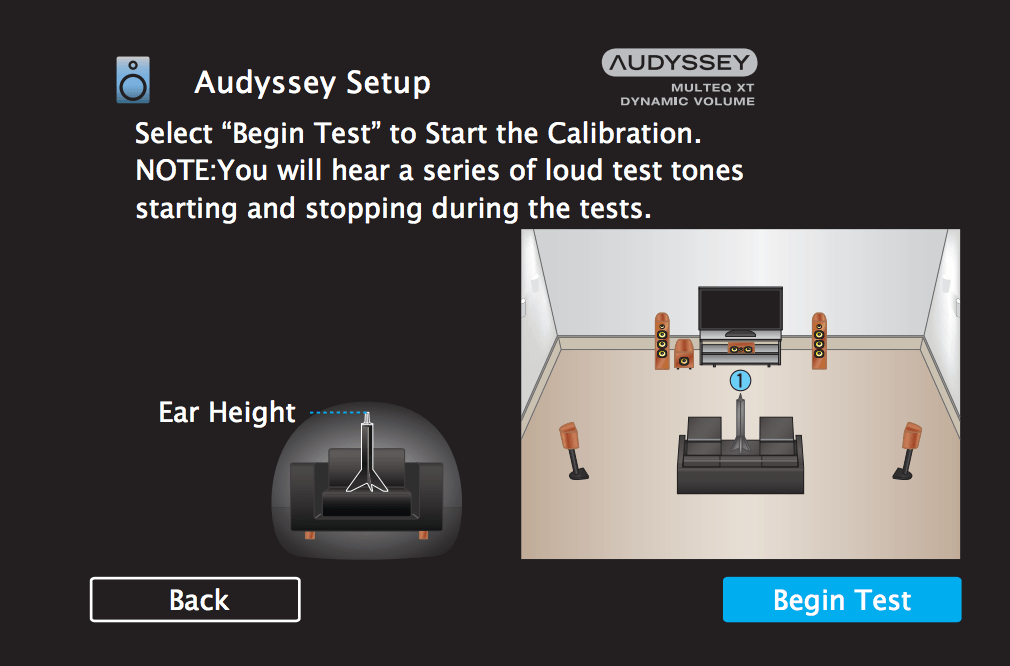
Step 7: CONTROL YOUR SPEAKER SOUND
Receivers now come with systems that make it easy to auto-calibrate the sound to be in line with the size of the speakers and the room they are in. Connect your microphone and place it in a spot you will sit often.
Step 8: SETTING UP THE NETWORK
In case you have not yet received a prompt to do this, you should now connect your receiver to the network in your home for easy steaming. The network setup is usually pretty straightforward, but if you have a lot of devices or a relatively complex home network you can always contact us for a professional network installation otherwise all you need to do is follow the instructions specific to the model of your receiver, and you should be connected.
Step 9: REMOTE CONTROL
Now that your system is setup, it is time to take control. Use a universal remote to control all components such as streaming services from any room in your house, at your convenience.
That’s all it is to set up a home theater receiver. It is easy to do, as long as you follow the on-screen guide of your new receiver. If you have any question, feel free to contact Data Wire Solutions, and we will be glad to assist you.


Leave a Reply
Want to join the discussion?Feel free to contribute!