- Quick summary
- How to plan a home Ethernet layout
- How do Ethernet cables route through a finished home?
- How many Ethernet drops do you need per room?
- Where should you put a home network rack?
- Which Ethernet cable is best for homes: Cat6 or Cat6A?
- Wiring for Wi-Fi access points and security cameras
- Testing and labeling home network cables
- Recommended home network equipment
- Home Ethernet wiring checklist
- Example home Ethernet plan
- FAQs
- References
Quick summary
A practical way to wire a home for Ethernet is to plan the rooms first, then choose the cable. Start with the places where a wired connection matters: home offices, TV walls, ceiling access points, cameras, printers, network storage, and any room that may become a work space later.
For most homes, the practical default is solid-copper Cat6 CMR home-run cabling back to one patch panel or rack. Use Cat6A selectively for long, hard-to-replace, or 10 Gb/s-focused runs. Add conduit where a future pull would be difficult. Label both ends before the wall closes.
In 2026, professional Ethernet installation commonly lands around $150 to $300 per drop as a blended planning range. Finished-wall retrofits in older Westchester homes can run closer to $250 to $450+ per drop when plaster, stone, tight chases, or patch coordination are involved. Use our network cabling cost guide for a deeper budgeting pass.
- Use Ethernet for fixed devices and access points, not every phone or tablet.
- Plan one central rack or panel location before you count drops.
- Run two drops to serious work areas and media walls when the route is already open.
- Pull one cable to each planned ceiling access point and camera location.
- Use solid-copper CMR cable for typical in-wall residential runs. Use CMP only where a true plenum path requires it.
If the walls are already finished, read the pre-wire vs retrofit cabling guide before assuming every room needs to be opened.
For help turning the room list into a quote-ready scope, see our networking infrastructure service.
How to plan a home Ethernet layout
Plan home Ethernet by locating specific devices rather than just counting rooms. Mark exact spots for desks, media centers, and APs on a floor plan.
A TV wall on the north side of the living room is a specific location. "Living room" is not enough. A desk in a den is a specific location. "Future office maybe" needs a likely wall, a rack path, and a decision about whether one or two drops are worth pulling now.
A useful plan includes device locations, cable types, routing, internet provider requirements, future expansion, and room-use changes. That matches Leviton's residential installer guidance and matters in occupied homes. A bedroom can become an office. A family room can become a media wall. A basement can become the network rack location after the ISP moves the fiber handoff.
The most serviceable structured cabling pattern is still a home-run layout. Each Ethernet drop runs back to one central patch panel or rack instead of daisy-chaining from room to room. That makes troubleshooting easier, keeps the switch in one place, and lets a future installer move a port by changing a short patch cord instead of tracing hidden wall cable.
For older homes, including the plaster-and-stone houses we wire in Westchester, the room-first approach is especially useful. Plaster walls, stone foundations, finished basements, older additions, and tight utility closets can make one straightforward drop take longer than three well-routed drops in another part of the house. The goal is not to blanket every wall. The goal is to hardwire the places that would be costly or disruptive to revisit.
If a route is already open, pull the extra useful cable now. If a route is finished, selective drops usually work better than a whole-house fishing job.
How do Ethernet cables route through a finished home?
Most finished homes use an attic-down, basement-up, or closet-chase routing strategy. The cleanest path depends on access, not just room distance.
Attic-down routing works well when the target rooms sit below accessible attic space. The installer can drop cable down interior wall cavities, then terminate near desks, TV walls, or access point locations. This is often useful for second-floor bedrooms and ceiling APs.
Basement-up routing works well when the basement ceiling, sill area, or utility room gives access to first-floor walls. It is often the cleaner path for offices, living rooms, and media walls in older homes where the attic does not reach the target room.
Closet-chase routing uses stacked closets, mechanical chases, or other hidden vertical paths to move cable between floors. It is not always available, but when it is, it can reduce drywall cuts and make the rack location more flexible.
For TV walls, built-ins, and hard-to-reopen paths, Flexible ENT, often called Smurf Tube, can be useful. A short conduit path from the media cabinet to the TV opening can make future HDMI, fiber, or Ethernet changes possible without reopening the wall.
The practical question is simple: can the route reach the room cleanly from above, below, or through a chase? If not, the job may need a selective drywall opening, exterior conduit, or a smaller scope.
How many Ethernet drops do you need per room?
Most rooms require one or two Ethernet drops. Install two drops at main desks and media walls, and one drop for bedrooms and ceiling access points.
| Location | Starting point | Add more when | Installer note |
|---|---|---|---|
| Home office or den | 2 drops at the main desk wall | Two people work there, a printer/NAS/VoIP phone lives there, or the room may change layout | Two drops are often lower-maintenance than adding a small switch later. |
| Main TV or media wall | 2 to 3 drops behind the cabinet or TV zone | There is a game console, streamer, AVR, control processor, or future media cabinet | Put the low-voltage plate where furniture will not crush patch cords. |
| Bedrooms and flex rooms | 1 drop on the likely desk or TV wall | The room may become an office, guest suite, or gaming room | Do not overbuild every bedroom in a retrofit. Prioritize likely use cases. |
| Ceiling access point | 1 Cat6 or Cat6A drop per planned AP | The ceiling is open or the house has plaster, masonry, or weak mesh performance | A wired AP drop often improves Wi-Fi more than another wireless mesh node. |
| Kitchen or family room | 1 drop only if there is a real device or AP location | There is a desk nook, wall display, smart appliance plan, or central AP location | Avoid outlets behind appliances or where heat and service access are poor. |
| Printer, NAS, or utility area | 1 to 2 drops | The device needs stable LAN access or future rack adjacency | NAS and backup devices usually belong near the rack, not in a random room. |
| Garage, patio, gate, or camera path | 1 drop per AP or camera location | Outdoor coverage, gate access, or detached-building service is planned | Use the correct outdoor pathway and surge strategy; do not treat exterior Ethernet like an indoor patch cord. |
| Network rack or closet | Patch panel capacity above today's drop count | You expect APs, cameras, or office expansion | Leave spare switch ports, rack space, and labeling room. |
For a typical 3-bedroom home, a sensible first-pass plan might be:
- 2 drops to the home office.
- 2 or 3 drops to the main media wall.
- 1 drop to each bedroom or flex room that may become a work area.
- 1 drop to each ceiling access point.
- 1 drop to any planned camera, garage AP, or detached-building handoff.
- Spare capacity in the patch panel and switch.
For a small office, count by work area instead:
- 1 drop per primary workstation as a minimum.
- 2 drops at shared desks, reception, and conference displays.
- 1 drop per ceiling AP.
- 1 drop for each printer, scanner, NAS, VoIP phone base, or point-of-sale location.
- Enough rack capacity for the switch, firewall, modem or ONT, patch panel, and UPS.
A media-heavy family room can justify four drops. A guest bedroom may need none in a finished-wall retrofit. A ceiling AP in the center of a plaster-heavy home may matter more than three bedroom jacks.
Where should you put a home network rack?
Place the network rack in a dry, accessible basement or closet. Ensure the location has continuous power, ventilation, and clear cable pathways.
Pick the rack or network panel location before finalizing the drop count. Every home-run cable needs to land somewhere, and that location affects cable length, route difficulty, ventilation, noise, and future service.
Good rack locations usually have five traits:
- Access: You can reach the equipment without moving storage boxes or furniture.
- Power: There is nearby power for the modem or ONT, gateway, switch, and UPS.
- Ventilation: Switches and PoE gear create steady heat.
- Pathways: Basement, attic, closet, or chase access keeps cable routes practical.
- Service space: The panel has room for a patch panel, cable slack, labels, and future additions.
- PoE budget: Add up the total wattage for planned APs and cameras before choosing the switch. Some newer devices require PoE+ or PoE++, so do not buy by port count alone.
Leviton's residential guide recommends a dry, well-lit, conveniently accessible location and notes that a utility room, closet, or basement can work when the pathway makes sense. That matches what we see in the field. A central location is useful, but the best network closet is often the one with clean routes and service access, not the one at the exact center of the floor plan.
Keep the standard length limits in mind. Fluke describes a full copper channel as the complete switch-to-device path, including patch cords, and notes that the overall channel should stay within 100 meters. The permanent in-wall portion is up to 90 meters. Most houses are nowhere near that limit, but large homes, detached garages, and long basement-to-attic paths can get closer than expected once you include real routing, not straight-line distance.
In older Westchester homes, a basement utility room often wins because it has the ISP handoff, vertical chase options, and a better path to first-floor walls. In other homes, a second-floor closet below attic access can be cleaner for AP and bedroom drops. For some renovations, a small rack near the electrical and low-voltage handoff is the right answer, with conduit reserved for hard-to-reach future runs.
Which Ethernet cable is best for homes: Cat6 or Cat6A?
Cat6 is best for most homes. Use Cat6A for full 10 Gb/s to 100 meters, long backbones, or runs that are hard to replace later.
| Cable | Use it for | Be careful when | Practical verdict |
|---|---|---|---|
| Existing Cat5e | Known-good 1 Gb/s room drops and some short 2.5/5 GbE upgrades with compatible hardware | It is unlabeled, damaged, daisy-chained, or routed through unknown splitters and phone wiring | Keep it when it tests clean. Do not rip it out just because it is older. |
| Cat6 | Most new room drops, TV walls, desks, printers, 2.5/5 GbE links, and many access point runs | You require full 10 Gb/s beyond about 55 m / 180 ft or the route will be very hard to revisit | Best default for most home Ethernet wiring. |
| Cat6A | Long backbones, full-length 10 Gb/s, premium AP drops, rack-to-rack links, and open-wall routes you do not want to pull twice | Finished-wall retrofit paths are tight or the larger cable makes the pull worse | Use where the extra size and termination care are justified. |
| CCA cable | None for permanent category cabling | A low-cost box claims Cat6 but does not clearly state solid copper | Avoid it. Use solid-copper CMR or CMP cable as the pathway requires. |
Fluke's 10GBASE-T guidance is a useful reality check. If a new installation is intended to support 10GBASE-T to 100 meters / 328 feet, Category 6A is the right specification. Cat6 10GBASE-T is a shorter-run answer: Fluke cites up to 37 meters, and 37 to 55 meters depending on the alien crosstalk environment. That is why we use a hybrid recommendation: Cat6 for most ordinary drops, Cat6A for the runs where 10G headroom or replacement difficulty matters.
Wi-Fi 7 also changes the cabling conversation, but not in a simplistic way. Many modern APs use 2.5 GbE or 5 GbE uplinks, and Cisco's multigigabit guidance shows those speeds running over Cat5e and Cat6-class access cabling. The Ubiquiti U7 Pro, for example, is a current ceiling-mounted Wi-Fi 7 access point with a 2.5 GbE uplink, 6 GHz support, and PoE+ power. That does not mean every room needs Cat6A. It means AP locations should be planned early, wired cleanly, and powered from a switch with enough PoE budget. For higher-end APs with 10 GbE uplinks, Cat6A becomes easier to justify.
A common mistake is buying cable only by the category printed in the listing. For typical in-wall residential runs, CMR / riser-rated Cat6 is the normal starting point. CMP / plenum-rated cable is for air-handling spaces and is usually unnecessary in a home unless the actual pathway requires it. For permanent in-wall cabling, use solid-copper cable with the correct jacket rating. trueCABLE's copper-clad aluminum testing and code discussion is direct for good reason: CCA is a poor choice for category cabling and PoE devices. If the cable is unusually low-cost, lightweight, or vague about conductor material, do not build the house around it.
For a deeper category decision, read Cat6 vs Cat6A for homes and small offices. For the step-by-step pulling and termination workflow, see the Cat6 cable installation guide.
Wiring for Wi-Fi access points and security cameras
Ceiling access points and security cameras require dedicated Ethernet runs. Route these cables directly to the device locations for reliable PoE.
The most valuable Ethernet drops are often not the obvious wall jacks. They are the device-specific runs that make the whole system behave better.
Ceiling access points deserve their own pass. Do not simply put the router wherever the ISP modem lands and hope the signal reaches. Mark likely AP locations on the floor plan, then confirm the cable route and ceiling access. One clean ceiling Cat6 run can outperform a stack of poorly placed mesh nodes, especially in homes with plaster, stone, or additions.
Camera drops also need separate planning. A camera cable is not just "one more Ethernet jack." It has to land at the right height, see the correct field of view, avoid obvious tampering, and return to a switch that can support PoE if the camera uses it. If camera coverage is part of the project, link the Ethernet plan to the security plan before rough-in.
Media walls need enough ports to stay tidy without overbuilding. A TV, streamer, game console, AVR, and control device can outgrow a single jack quickly. Two or three drops at the media wall usually gives a cleaner result than hiding a small switch behind a TV, especially if the cabinet is tight or poorly ventilated.
For Wi-Fi design, see How many Wi-Fi access points do you need?. For TV-wall planning, see the home media wall setup guide.
Testing and labeling home network cables
Label both ends of every Ethernet cable before termination. Use a room-code format and wire-map test every drop for correct pin continuity.
Use a room-code format that a future owner or technician can understand: OF-1, LR-TV-2, AP-HALL-1, CAM-DRIVE-1. Leviton's guide recommends a master list, a letter or number system, labels on both ends, and a wiring chart that identifies rooms clearly instead of relying on vague names.
Leave service slack at the wall and the rack. The Leviton guide recommends service loops so terminations can be repaired or changed later without pulling new cable. It also calls out bend radius and gentle handling. Category cable is not Romex. Sharp bends, crushed staples, and messy terminations can create problems even when the cable jacket says Cat6.
Testing should match the project. At minimum, every drop should be wire-mapped for continuity and pair order. For higher-stakes work, certification or qualification testing gives better documentation. Fluke's channel and permanent-link guidance is useful here: the permanent link is the fixed in-wall portion, and that is the part you most want to prove before the walls are closed or the installer leaves.
Recommended home network equipment
Match network hardware to your cable category and rack size. Choose reliable switches, patch panels, and keystones that support your speed needs.
These are planning-level examples for a clean home Ethernet wiring project. Match final product choices to the cable rating, wall type, rack size, and local code requirements for the actual job.
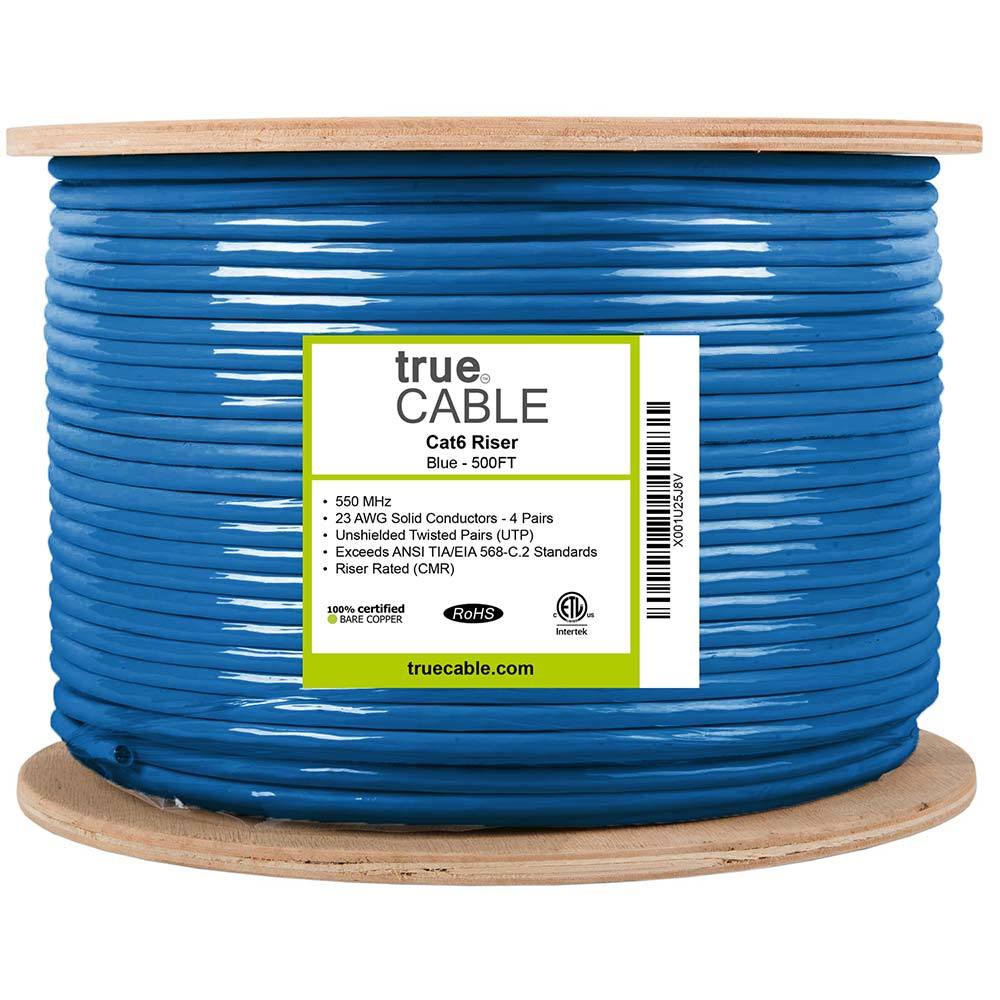
This card highlights the product details most relevant to this section.
- 1000 ft riser-rated Cat6 bulk cable for in-wall structured cabling
- 23AWG solid bare copper conductors suitable for PoE and data runs
- CMR jacket and ETL listing for residential and commercial riser use
This card highlights the product details most relevant to this section.
- 90-degree punch-down Cat6 keystone sized for 23-24 AWG solid copper conductors
- Supports PoE, PoE+, and PoE++ up to 100W with UL and ETL compliance claims
- Includes IDC caps and works with standard wall plates and keystone patch panels
This card highlights the product details most relevant to this section.
- 12 ports, Cat6, supports 10G Ethernet (TIA/EIA 568-C.2 compliant)
- Works in standard 19-inch racks, wall-mount brackets, and cabinets
- Includes D-rings and cable ties; punch-down type termination
- Label strips for port identification
This card highlights the product details most relevant to this section.
- 6U / 14-inch deep — fits most home closets and utility rooms
- 44 lb weight capacity; all-steel construction
- Standard 19-inch mounting for patch panels, switches, and shelves
- Low-profile design; minimal wall protrusion

This card highlights the product details most relevant to this section.
- Verifies pinout and continuity on Ethernet runs
- Remote terminator for one‑person testing
- Useful when validating new backhaul runs

This card highlights the product details most relevant to this section.
- Single-gang low-voltage brackets for Ethernet, coax, HDMI, and speaker cable terminations
- Flush old-work style bracket for clean wall plate installs
- Five-pack useful for rough-in planning across office, TV, and network locations
Home Ethernet wiring checklist
Complete this planning checklist before pulling cable or requesting an installation quote to ensure all necessary device locations are covered.
- Mark every room that needs wired service on a floor plan or sketch.
- Identify the exact wall or ceiling location for each desk, TV, access point, camera, printer, and network device.
- Choose the rack or panel location before finalizing the cable count.
- Count drops by use case, not by room count alone.
- Decide where Cat6 is enough and where Cat6A is worth the larger cable and harder termination.
- Add conduit to hard-to-reopen TV walls, office walls, attic-to-basement paths, and detached-building routes.
- Confirm the ISP handoff location and how it reaches the rack.
- Use solid-copper, in-wall-rated cable with the right jacket for the pathway.
- Plan labels for both ends of every cable before pulling.
- Leave service slack at the wall and rack.
- Test every drop and keep a port map with the patch panel.
Example home Ethernet plan
A three-bedroom home typically needs about 10 active Ethernet drops for an office, media wall, bedrooms, and ceiling access points.
Here is a realistic starting plan for a home with a main living area, one primary office, three bedrooms, and a basement rack:
| Area | Drops | Reason |
|---|---|---|
| Primary office | 2 | Docked laptop or desktop plus printer, VoIP phone, or spare |
| Living room media wall | 3 | TV, streamer or console, and future cabinet device |
| Bedroom 1 | 1 | Future desk or TV |
| Bedroom 2 | 1 | Future desk or TV |
| Bedroom 3 / guest room | 1 | Flexible future use |
| Main-floor ceiling AP | 1 | Wired backhaul and PoE for coverage |
| Upper-floor ceiling AP | 1 | Coverage for bedrooms and hallway |
| Basement rack | 24-port patch panel capacity | Room for the 10 active drops plus future cameras, APs, and office changes |
That plan has 10 active cable runs, but it does not require a 10-port patch panel. A 24-port panel is usually more comfortable because it gives clean labeling room and future capacity. If the walls are open, add one or two strategic spares instead of assuming the first plan is final.
In a finished-wall retrofit, we would trim the scope. The priority would usually be the office, the media wall, and the access point locations. Bedrooms can wait unless there is a real device or a room is likely to become an office.
FAQs
How many Ethernet drops should a home office have?
Plan two Ethernet drops at the main desk wall. One can serve the primary computer or dock, and the second can handle a printer, VoIP phone, small switch, or spare. If two people work in the same room, plan around both desk locations.
Should every bedroom get Ethernet?
In new construction or open-wall renovation, one drop per likely bedroom desk or TV wall is reasonable. In a finished retrofit, prioritize bedrooms that may become offices, gaming rooms, or media spaces instead of fishing every room by default.
Is Cat6 enough for home Ethernet wiring?
Yes, Cat6 is enough for most home Ethernet wiring. Use Cat6A for long backbones, 10 Gb/s-focused runs, premium access point locations, and routes that will be hard to replace later.
Where should the home network rack go?
Use a dry, accessible, ventilated location with power and practical cable pathways. Basements, utility rooms, and closets are common choices. The best location is not always the geometric center of the home; route access and serviceability matter more.
Can I use a small switch in a room instead of running multiple Ethernet drops?
Yes, a small switch can work for low-risk rooms, especially in finished homes. For offices, media walls, and new construction, multiple home-run drops are cleaner, easier to document, and easier to support later.
Should I run Ethernet to Wi-Fi access points?
Yes. If you are planning real access points, run Ethernet to their ceiling or wall locations. Wired backhaul and PoE make the Wi-Fi system more predictable than relying on wireless mesh hops.
Should I wire my house with fiber optic cable?
Usually no. Fiber is useful for long backbones, detached buildings, and switch-to-switch links, but most TVs, computers, cameras, and access points still need copper Ethernet for standard connectivity and PoE power.
References
Plan the project with a site visit
Confirm wiring, equipment, placement, and installation scope before hardware is locked in.