- Quick answers
- What Does a Professional Cat6 Installation Include?
- How We Install Wired Networks in Westchester Homes and Offices
- Should You Choose Cat6 or Cat6A in Westchester?
- How Much Does Cat6 Installation Cost in Westchester County?
- What Code and Material Details Matter in Westchester?
- What Should Be Wired First Instead of Left on Wi-Fi?
- Before and After: What Good Work Looks Like
- Frequently Asked Questions
- Key takeaways
- References
- Next steps
Quick answers
- A professional Cat6 installation includes a site survey, route planning, home-run cabling, keystone jack and patch panel terminations, testing, labeling, and a port map.
- In most Westchester homes, standard Cat6 is enough for everyday room drops and many shorter 10 GbE runs; Cat6A is usually reserved for longer, denser, noisier, or harder-to-revisit pathways.
- National installed CAT6 pricing is commonly cited around $125 to $250 per drop, but finished-wall Westchester retrofits often run higher once plaster protection, fishing time, and patch coordination are involved.
- Cable rating matters. CMP/plenum-rated cable is typically relevant when the route enters an environmental air plenum; not every suspended ceiling is automatically a plenum.
- The biggest quality difference is usually not the cable label. It is route quality, clean terminations, testing, and documentation.
This guide explains what a professional wired network install actually includes in Westchester County, how we decide between Cat6 and Cat6A, what realistic pricing looks like in 2026, and which code/material details matter before drilling starts.
Many local upgrade conversations start after a homeowner moves to Verizon Fios gigabit or 2 gig service, or to an Optimum multi-gig plan where available, and realizes the internet service is now faster than the in-home network feeding it.
What Does a Professional Cat6 Installation Include?
A professional Cat6 installation includes site surveying, safe cable routing, panel termination, and documented port-by-port testing.
The visible result is a tidy rack and clean wall plates. The real value is that the network is easier to support, easier to expand, and less likely to fail in ways that are expensive to trace later.
- Site survey to confirm layout, construction type, existing hardware, and likely pathways
- Design of a central rack, shelf, or structured panel with home-run cabling to each room
- Pulling solid-copper Cat6 or Cat6A with labels at both ends
- Termination to patch panels and keystone jacks using consistent T568A/T568B pinouts
- Testing for continuity, wire map, and where needed qualification or certification to Cat6/Cat6A performance
- Delivery of a simple port legend with labeled wall plates, matching patch-panel ports, and clear notes on reused runs or spare capacity
- Photos or notes showing the rack and major pathway decisions when they will help future service or expansion
Good installers leave the next technician with fewer guesses. That matters whether the next change is a new PoE switch, a cleaner Wi-Fi access point layout, or a quick troubleshooting call six months from now.
How We Install Wired Networks in Westchester Homes and Offices
Our wired network process follows five steps: discovery, site walk, written scope, installation, and handoff.
That sounds simple, but the site walk is where most of the value is created. Westchester projects often involve plaster-and-lath walls, mixed additions, tight basements, finished attics, older closets, or stone foundation transitions that look easy on paper and are not easy in the field.
- 1Discovery call: define the rooms, devices, pain points, and likely budget range.
- 2On-site assessment: confirm pathways, rack location, power, ventilation, and any patch-risk areas.
- 3Written plan: document drop count, cable type, route assumptions, materials, and pricing guardrails.
- 4Installation: pull, terminate, test, label, and dress the rack or panel cleanly.
- 5Handoff: review labels, answer questions, and outline sensible next upgrades.
In finished homes, the route plan usually matters more than the raw drop count. A four-drop retrofit with clean basement and closet access can be straightforward. A two-drop job through old plaster, blocked wall cavities, and finished trim can take more time even though the scope looks smaller on paper.
Where a retrofit requires small access openings, we install the low-voltage hardware cleanly and coordinate any final patch or paint work with the client's contractor or painter.
Basements, closets, attics, and existing vertical chases are usually the cleanest first-choice pathways. Random wall openings are the expensive fallback, not the starting point.
Should You Choose Cat6 or Cat6A in Westchester?
Cat6 is the default for most room drops; Cat6A is the better choice for longer or higher-value runs where extra 10 GbE margin is worth the thicker cable.
Standard Cat6 is not limited to gigabit. Properly installed Cat6 can support 10GBASE-T on shorter runs, commonly up to 55 meters depending on the alien crosstalk environment. Cat6A is the full-distance 10G option, designed for 10GBASE-T to 100 meters.
In practical Westchester terms, that means many residential room drops do not need Cat6A just because the homeowner wants a strong network. A typical single-family floor plan often stays inside Cat6's comfortable range for ordinary devices, TVs, desktops, and many Wi-Fi access point uplinks. Cat6A becomes easier to justify on backbone runs, floor-to-floor links, rack-to-rack uplinks, dense cable bundles, or expensive-to-reopen pathways where you want the extra margin.
| Run type | Typical choice | Why |
|---|---|---|
| TVs, desks, printers, ordinary room drops | Cat6 | Usually the cleanest and most cost-effective choice for 1 GbE, multigig, and many shorter high-speed runs. |
| Ceiling AP locations | Cat6 or Cat6A | Cat6 is often enough; use Cat6A when the route is long, bundled, noisy, or expensive to revisit. |
| Floor-to-floor backbone | Cat6A | Higher-value pathway where long-term 10 GbE margin is more useful. |
| Rack-to-rack or core uplink | Cat6A or fiber | Best place to spend on performance margin because it affects the whole network. |
Use Cat6 for most endpoints. Use Cat6A selectively for long uplinks, noisy paths, dense bundles, and routes you do not want to reopen later.
How Much Does Cat6 Installation Cost in Westchester County?
Cat6 installation cost depends on wall access, pathway difficulty, total drop count, cable type, and how much rack, testing, and documentation work is included.
National CAT6 pricing published by Fixr currently sits around $125 to $250 per installed drop. That is a helpful baseline, not a Westchester promise. In this market, finished-wall retrofits often run above that baseline once plaster protection, fire blocking, ladder work, patch coordination, and slower fishing routes are part of the job.
These are planning numbers, not fixed quotes. Final pricing depends on access, finish sensitivity, travel path, rack scope, and whether painters, electricians, or building managers need to be coordinated.
| Scenario | Typical planning range | What moves the number |
|---|---|---|
| Single targeted retrofit drop in finished space | Often about $150 to $300 per line when access is straightforward | Plaster, masonry, fire blocking, ladder work, and patch coordination can push it higher. |
| Small retrofit with 4 to 6 new drops | Usually low four figures | Route difficulty, whether a rack already exists, and how much cleanup/testing is included. |
| Mid-size retrofit with several drops plus 1 to 2 AP locations | Usually low-to-mid four figures | Ceiling access, patch work, pathway length, and whether PoE switching or rack cleanup is bundled. |
| Whole-home or office pre-wire | Varies widely, but per-drop labor is usually materially lower than retrofit | Run count, trim stage, conduit, and whether cameras, speakers, or access devices are included. |
- Existing-home retrofits cost more per drop than open-wall pre-wire because the labor is in access, not just cable.
- Adding one or two extra runs during the same visit is usually cheaper than reopening the pathway later.
- PoE switches, access points, UPS units, and rack parts should be budgeted separately from the raw cable pull if they are part of the project.
- Good documentation is not fluff. It is part of the deliverable and should be visible in the scope.
Send a floor plan or a few room photos and we can narrow the likely pathway difficulty, drop count, rack scope, and whether Cat6A is worth using anywhere.
What Code and Material Details Matter in Westchester?
Cable jacket choice, fire-stopping, and pathway rules depend on the space the cable passes through, not just whether the cable says Cat6 or Cat6A.
New York's amended Uniform Code became effective on December 31, 2025. In practice, that means route planning should confirm whether the cable passes through rated assemblies, shafts, risers, or environmental air plenums, and the local authority having jurisdiction remains the final check.
- Use the jacket type that matches the space and the local code interpretation
- Treat CMP/plenum-rated cable as a route-specific requirement, commonly relevant in return-air plenums and some commercial ceiling spaces
- Do not imply that every suspended ceiling automatically requires plenum cable
- Fire-stop penetrations correctly when the route passes through rated walls or floors
- Keep low-voltage separated from AC mains and use proper supports instead of loose, improvised routing
“Drop ceiling” and “plenum” are not interchangeable terms. The safer article wording is to say that plenum-rated cable may be required where the route enters an environmental air plenum and that the local AHJ is the final authority.
This section is also a good trust signal because it shows the difference between installing cable and designing a route that will still make sense to an inspector, GC, or future technician.
What Should Be Wired First Instead of Left on Wi-Fi?
Wire anything stationary, bandwidth-hungry, or operationally important before spending money trying to solve the same problem with more wireless gear.
The first few Ethernet drops usually create the biggest quality-of-life improvement. They remove steady traffic from Wi-Fi, make PoE access points more effective, and give the network a cleaner backbone for future growth.
This is also why buying another mesh kit is not the same thing as improving the network backbone. Consumer mesh and ceiling access points both work better when their backhaul is wired. If the nodes still depend on wireless backhaul, the system is spending airtime to talk to itself before it ever serves the devices in the room.
- Ceiling access points and any node expected to act as primary backhaul
- TVs, media cabinets, streaming boxes, and gaming consoles
- Desktop workstations, docked laptops, printers, and NAS units
- VoIP phones, cameras, intercoms, and any device that may later need PoE
- A small number of spare ports near home offices or media areas where needs tend to grow
The best projects do not chase maximum drop count. They wire the rooms that actually reduce daily friction.
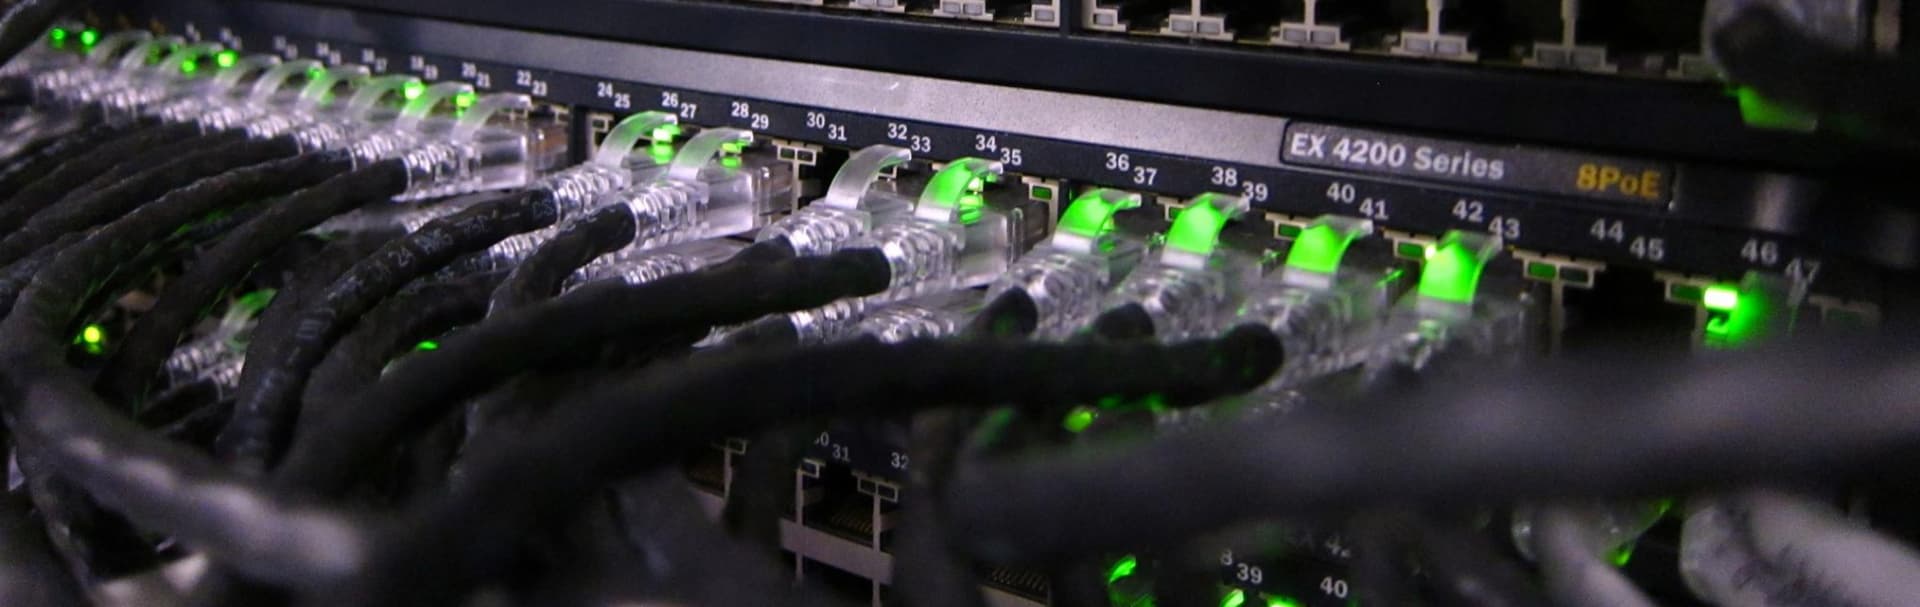
Before and After: What Good Work Looks Like
Good network work should look calm, labeled, and easy to understand after the crew leaves.
Many projects start with consumer switches, random patch cords, unlabeled wall runs, and a rack or closet that no one wants to touch. The after state should not just look cleaner. It should reduce support time because ports, gear, and cable paths are obvious.
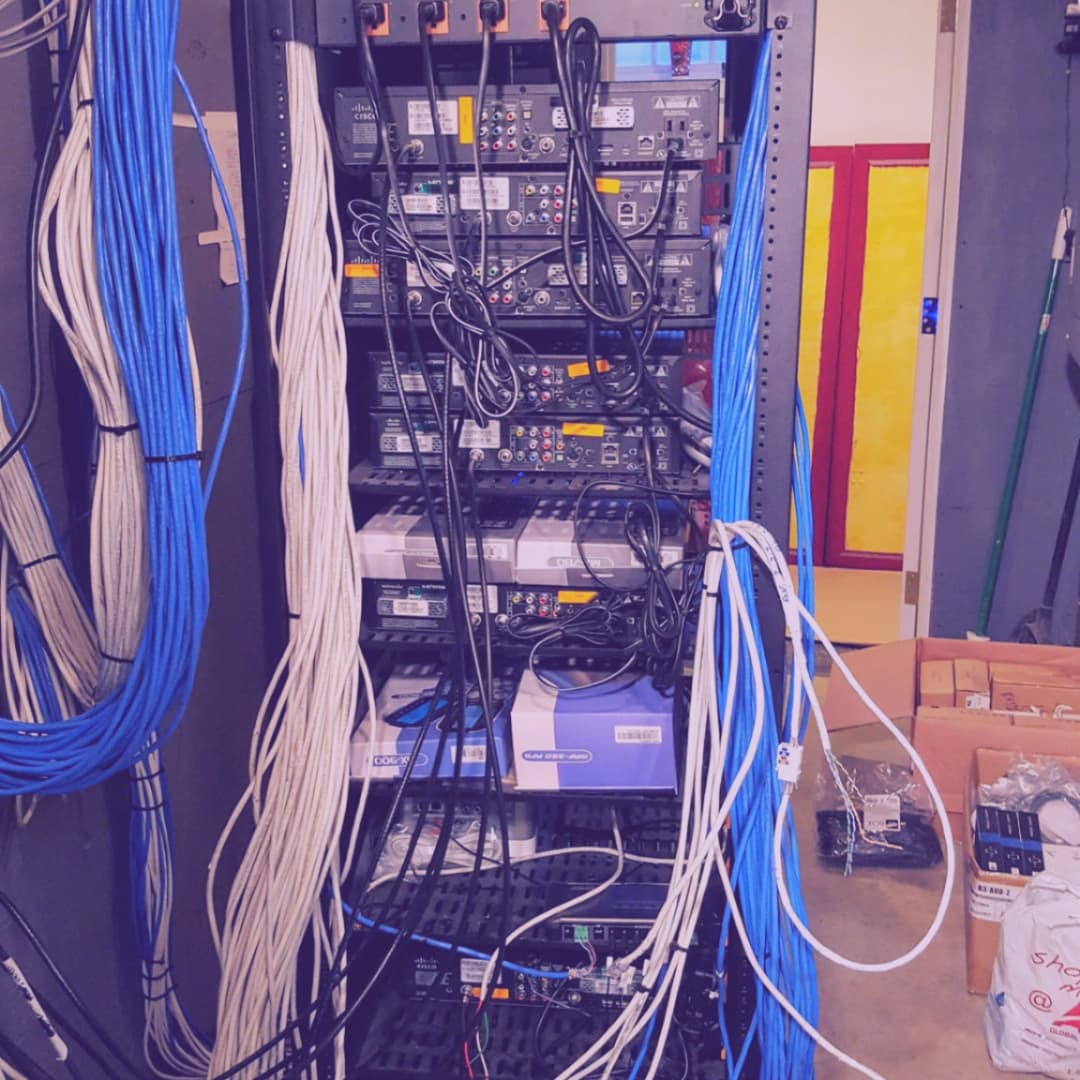
- Before: ad-hoc switches, unlabeled ports, difficult troubleshooting, and no clear upgrade path
- After: labeled patch panels, predictable port mapping, cleaner patching, and easier future additions such as cameras, APs, or office drops
Frequently Asked Questions
Do you only install Cat6, or can you work with Cat6A as well?
We install both. Cat6 is the default for most room drops. Cat6A is worth using on long uplinks, dense bundles, noisy pathways, rack-to-rack links, and other routes where full-distance 10 GbE margin matters more.
Can standard Cat6 really handle 10 gig?
Yes. Cat6 can handle 10GBASE-T up to roughly 55 meters in the right installation conditions. If the run is longer, Cat6A is the safer choice.
Do I need plenum cable in my house?
Not automatically. The need for CMP/plenum-rated cable depends on the space the route passes through. Some commercial ceiling and air-return conditions trigger it; many ordinary residential pathways do not. The local code interpretation and AHJ are the final check.
How disruptive is a typical retrofit project?
The goal is a targeted retrofit, not a demolition project. Most clean routes use basements, attics, closets, and service spaces first. Some patching may still be required in older plaster-and-lath homes, but a good route plan keeps that limited.
Can you reuse some of my existing cabling?
Often, yes. During the site visit we identify which runs are worth re-terminating, labeling, and testing and which are better replaced. The deciding factor is usually serviceability, not sentiment.
Key takeaways
- Professional Cat6 work is about route quality, terminations, testing, and documentation, not just pulling cable.
- Cat6 is still the right default for most Westchester room drops; Cat6A should be used selectively where the extra 10 GbE margin matters.
- Pricing needs real numbers. Straightforward finished-wall retrofit drops often start around the national baseline but can rise quickly when access gets difficult.
- Code language should stay precise: plenum-rated cable is route-dependent, and the AHJ is the final authority.
- A clean labeled rack is not cosmetic. It is what makes future support fast and predictable.
References
- Fluke Networks: 10GBASE-T field testing requirements — checked March 12, 2026
- Fixr CAT-6 installation cost guide — checked March 12, 2026
- New York Department of State: Notice of Adoption — checked March 12, 2026
- New York State Uniform Code — checked March 12, 2026
Next steps
If you are planning a wired network in Westchester County, the fastest way to tighten scope is to start with a floor plan, a list of devices that should be hardwired, and one realistic conversation about pathway difficulty. That is usually enough to separate a small targeted retrofit from a larger Cat6 or Cat6A project.
Plan the project with a site visit
Confirm wiring, equipment, placement, and installation scope before hardware is locked in.